#3: How to use a torque wrench properly
Knowledge and skill are not optional. Plus, riding slowly
People think a bicycle is simple because you can see through it.
But just the threaded fasteners of a bicycle contain myriad subtleties that the layperson has never considered. Thousands of years of human cleverness have gone into every screw.
Whole books have been written about how nuts and bolts work. Suffice to say it’s a deep subject.
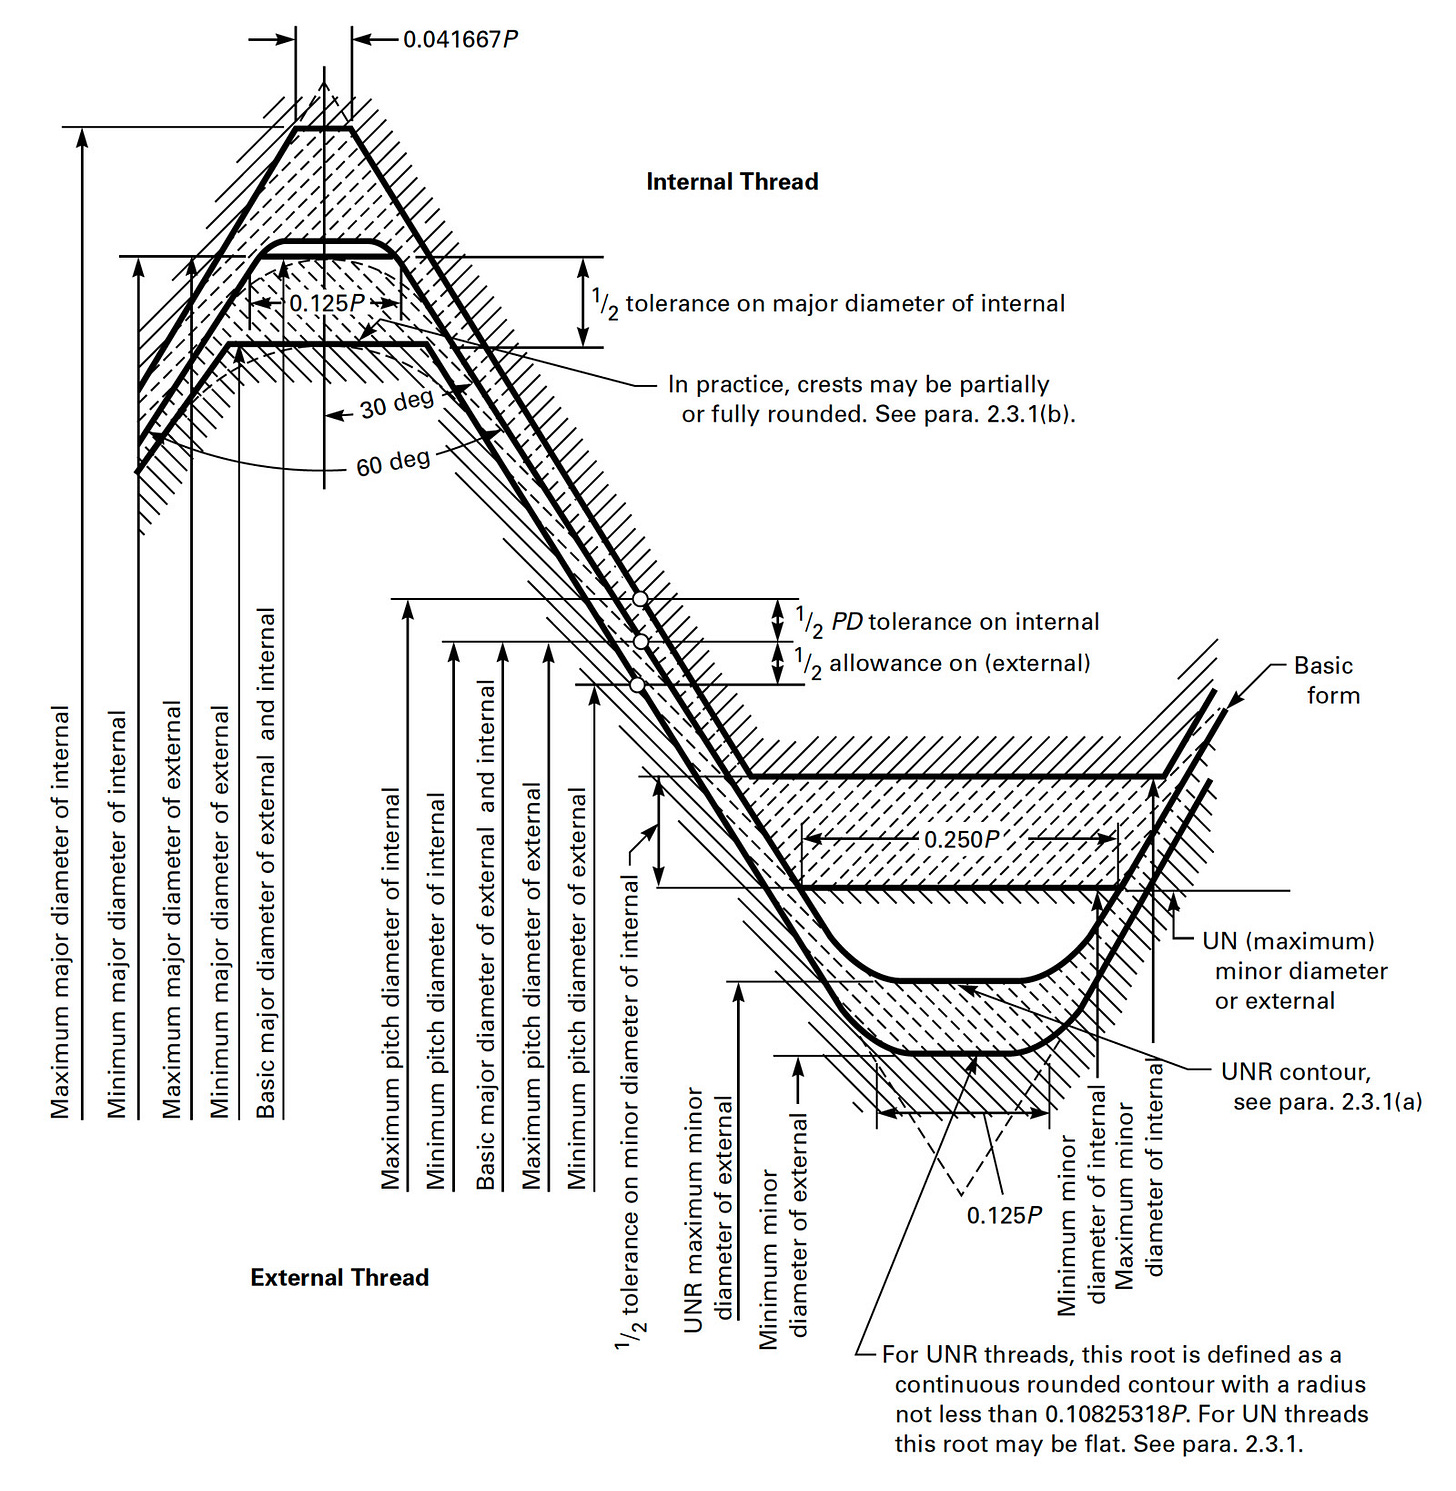
A glimpse of this complexity can be seen at Bolt Science, the website of a consultant who will solve your “bolting problems” if they don’t involve horses and barn doors.
Bolt Science has a weirdly fun quiz on the simpler aspects of nuts and bolts. I took it and scored 10 out of 10.
It is on this basis – that I got a flukey 10 in an internet quiz – that I dare to speak about torque now. Apologies to real experts.
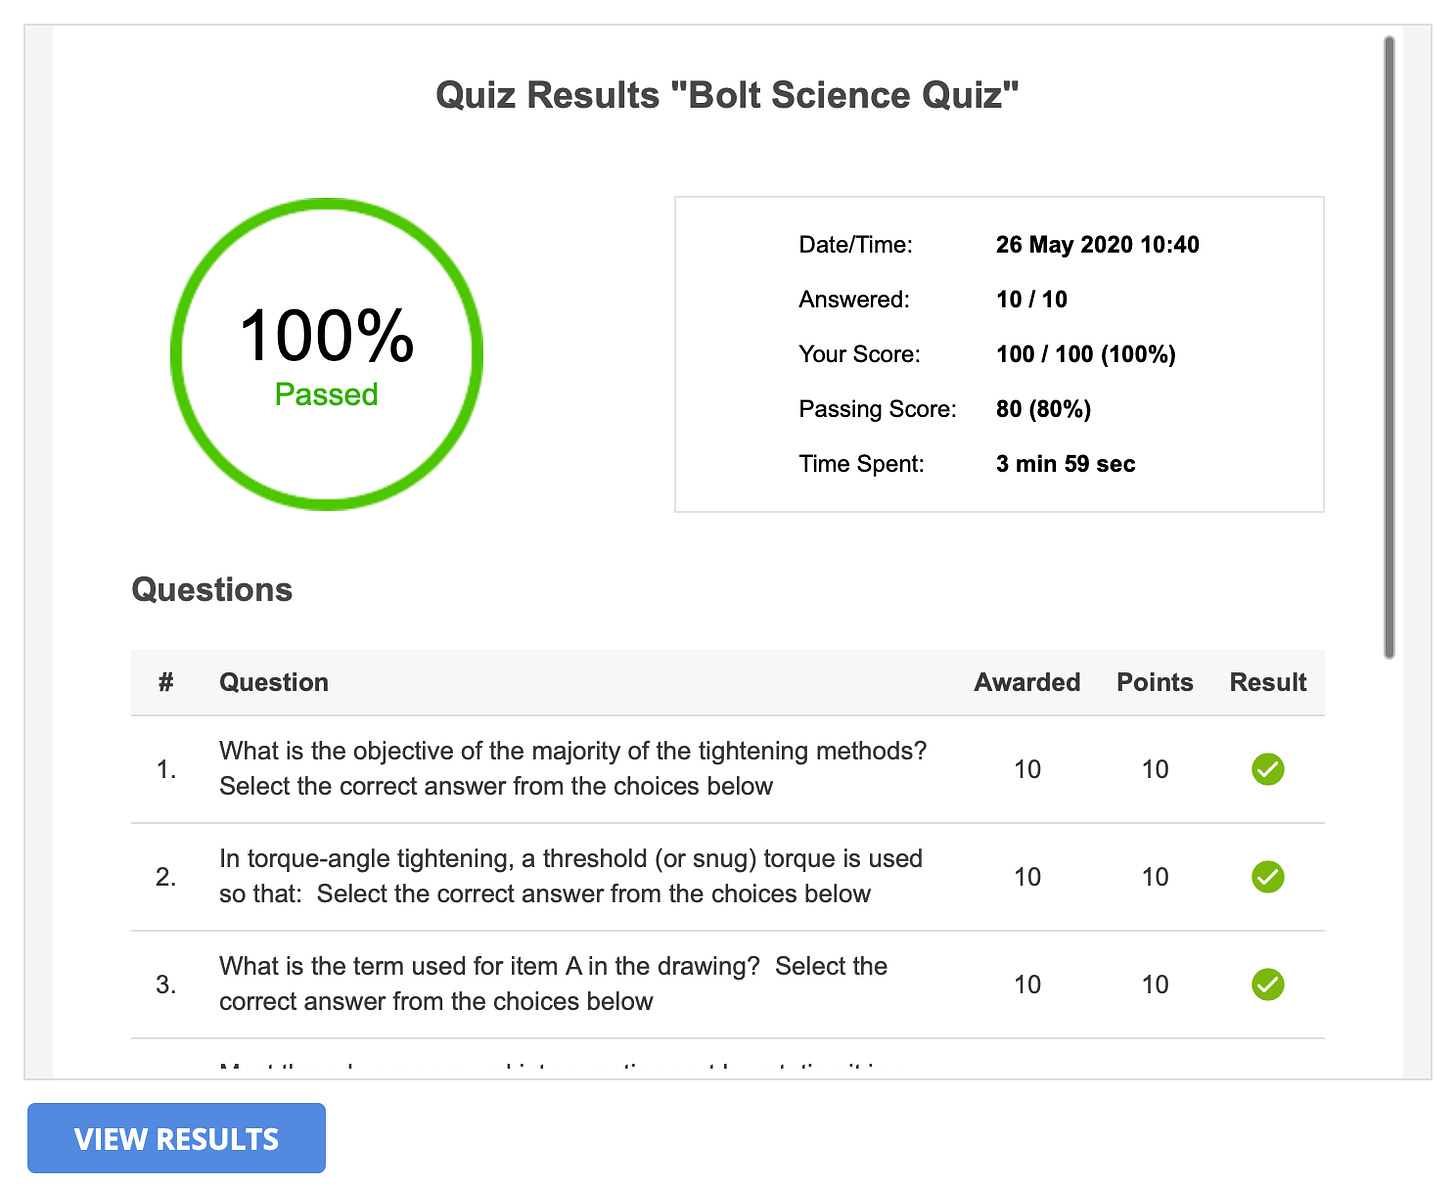
The basic idea of the screw-threaded fastener is that it converts torque (twisting force) into clamping force to hold a joint in compression.
The goal is to achieve a specific clamp force, or preload, that depends on the application. This clamp force is equal to the axial tension in the fastener. This tension, in turn, stretches the fastener by a known amount.
Oh yes: every bolt on your bicycle stretches. And not by a microscopic but visible amount. You may deduce this from the observation that you can easily tighten some bolts half a turn – so half the thread pitch, the distance between two adjacent threads – after the bolts have become snug (when they just begin to clamp).
In fact, this elastic stretch in bolts is essential to their function. The elasticity preserves preload in the joint after the bolt is set. It also provides the friction in the thread and under the bolt’s head that holds the fastener in place. No preload = no normal force on the thread faces and bolt head undersurface = no friction to retain the bolt.
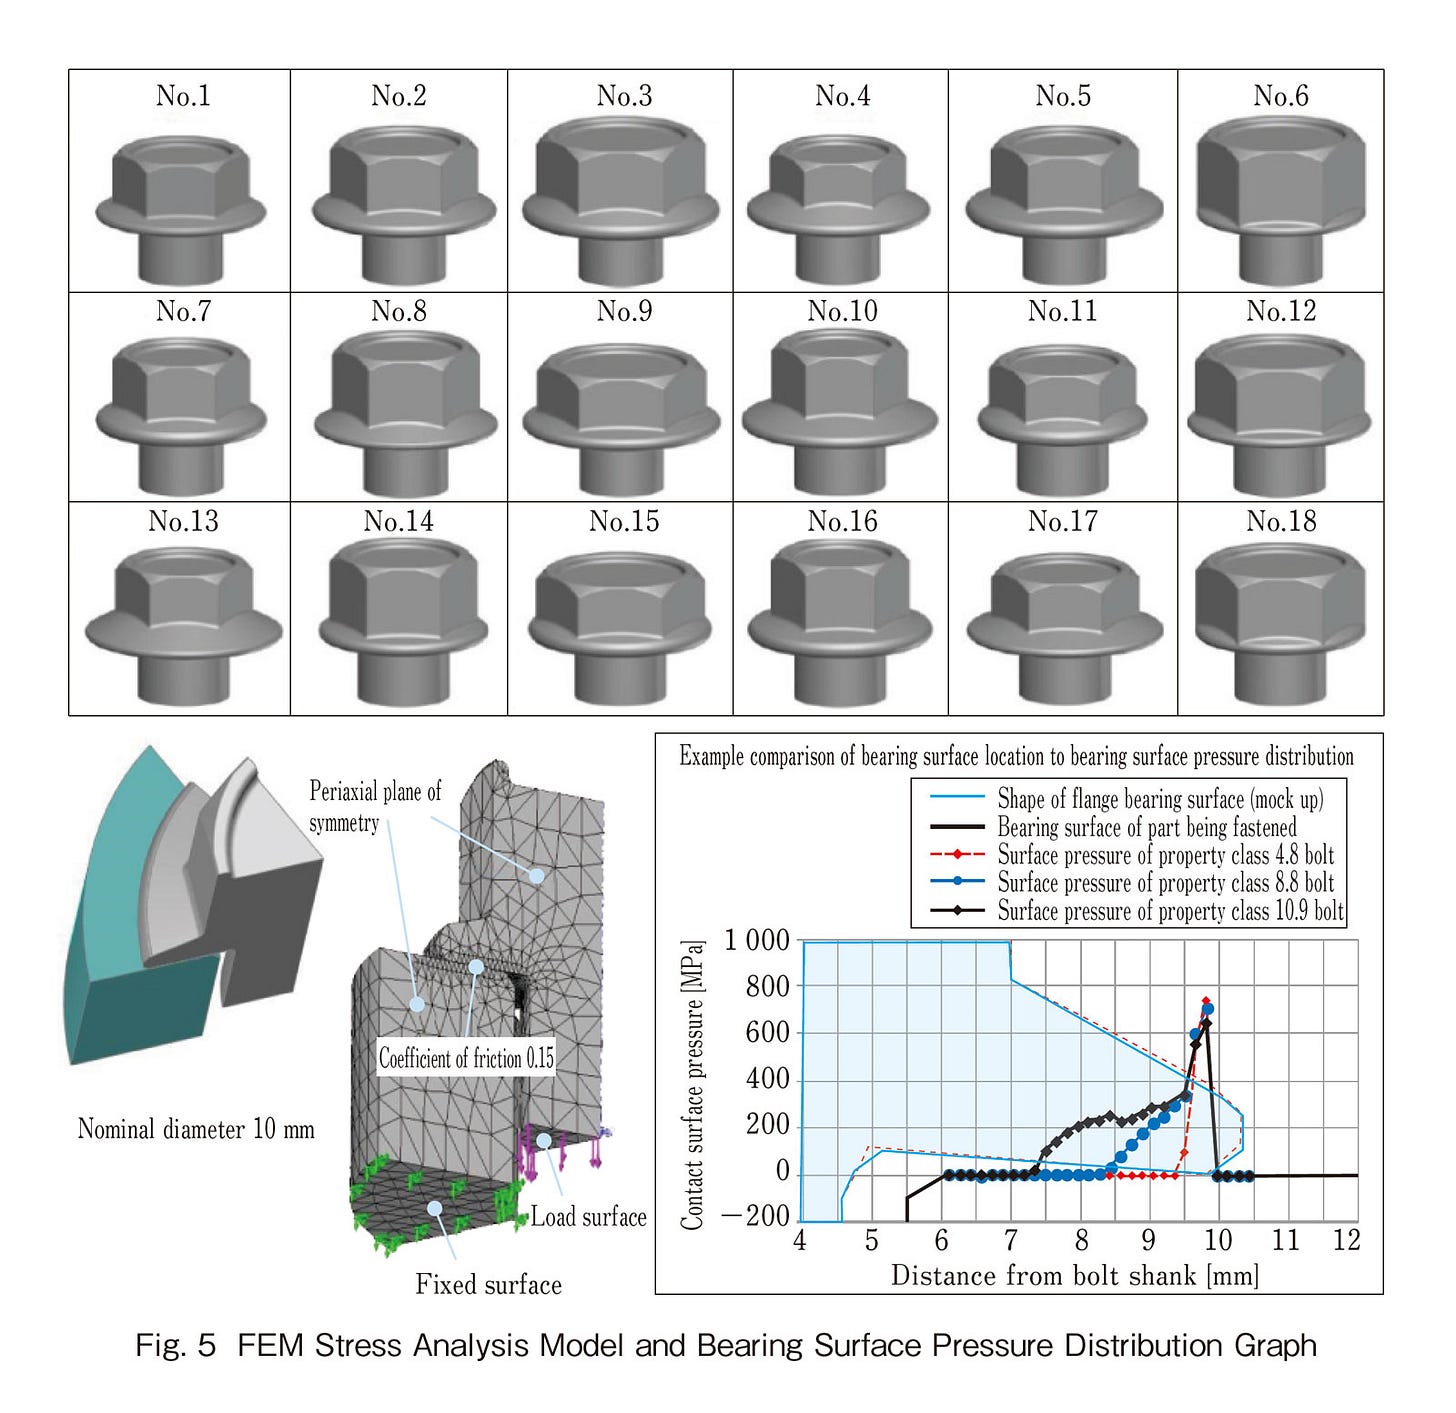
Under-tightening may leave the joint unstable in use, resulting in noise and premature wear. The fastener itself may fail because the service loads on the joint may be greater than the fastener tension, allowing the fastener to repeatedly stretch and fatigue over many stress cycles. Or the fastener may simply work loose and fall out (although Bolt Science shows that even that process is not as simple as I say).
Over-tightening, on the other hand, may plastically (permanently) stretch the fastener, strip the threads, round the flats on the head, fracture the fastener, damage the underlying joint, or harm the tool. Even if the excess tension doesn’t damage anything directly, it may warp the components so that they don’t operate correctly or become damaged in use.
Today’s bicycles amplify these problems, because the margin for error has been systematically engineered out of them by a hundred years of weight weenie-ism. All parts of a modern road bike are marginally designed. Every bolt or screw has a narrow range of acceptable torque.
This is why the torque wrench has become an indispensable tool. Without it, even the best bicycle mechanics cannot guarantee proper tightening of all fasteners. For amateurs who spend most of their day at a keyboard, it’s hopeless to even try.
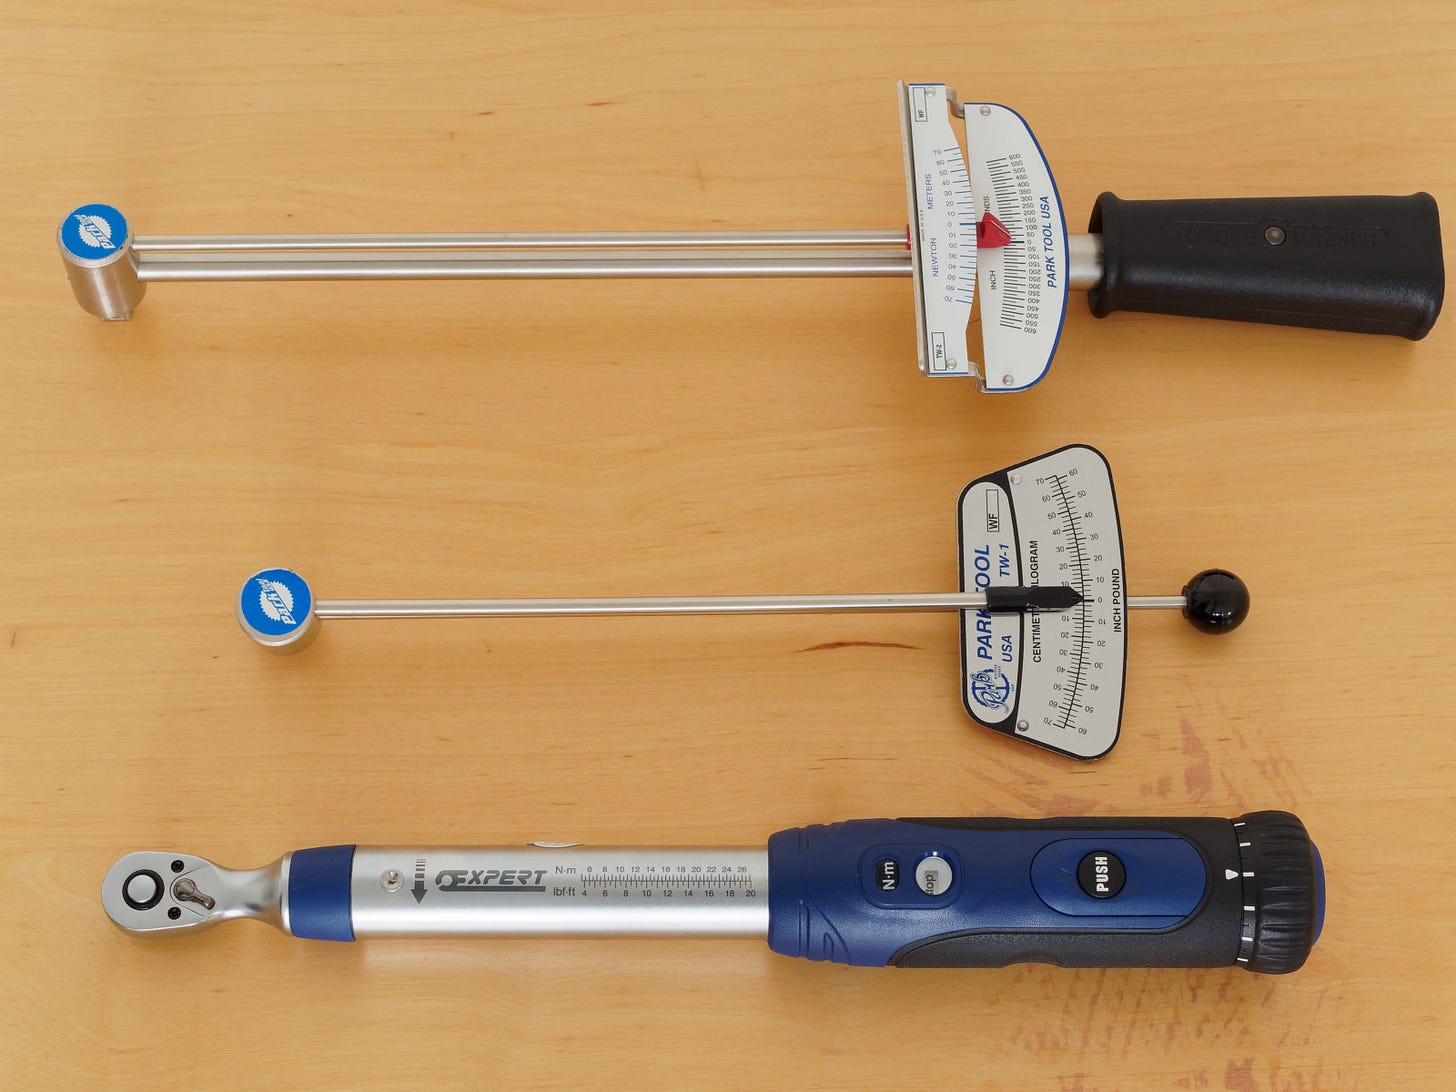
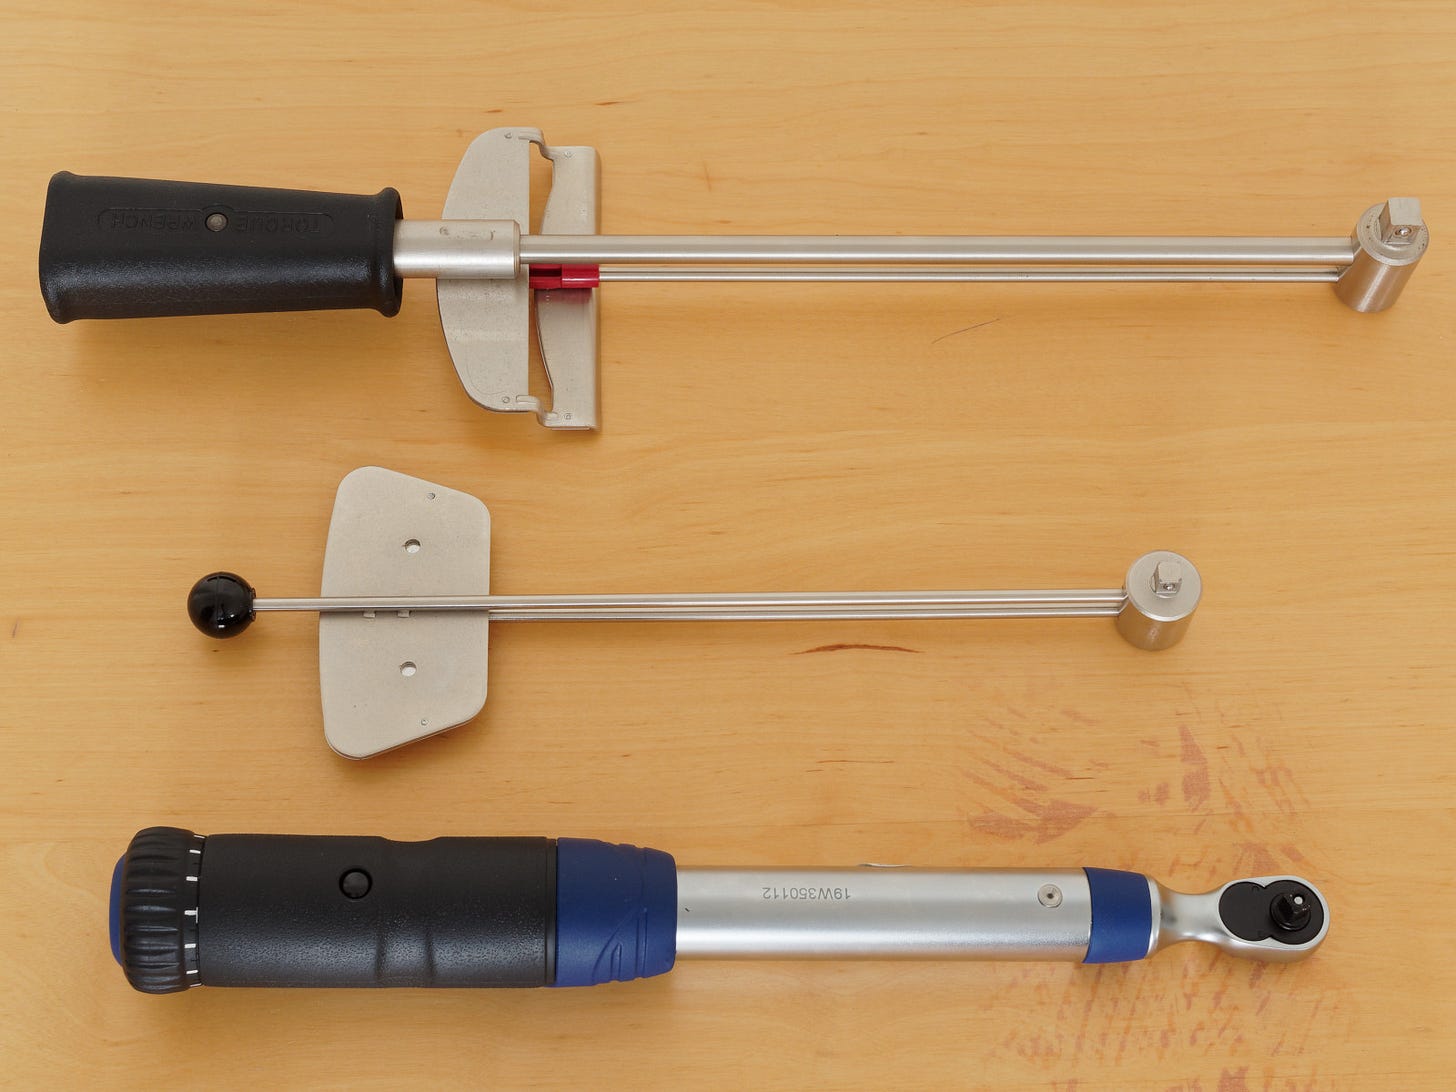
Torque wrenches I use on bicycles: Park Tool TW-2 (0–70 Nm, ⅜" drive), TW-1 (0–7 Nm, ¼" drive), and Expert E100105 (5–25 Nm, ¼" drive)
I grew up around machinery and once operated an offset printing press for a living, but I have destroyed my fair share of bicycle parts and fasteners with the wrong torque – usually too high in my case, although I more often find insufficient torque on other people’s bicycles. Breaking a few bolts is a good education for the beginner mechanic, but you will still need a torque wrench.
Shimano publishes comprehensive torque specifications in various documents scattered across si.shimano.com, an essential reference for Shimano users. Search the website by full part number, for example, FC-R7000 for the current 105 cranks. Your search will return some of the following PDF document types:
DM, dealer manual. FC-R7000 example. These include detailed installation procedures and most of the torque specifications you will need.
EV, exploded-view diagram. FC-R7000 example. These show the available replacement parts, e.g. chainring bolts, compatibility with parts for other similar components, how the parts fit together, and sometimes how a moving part works.
SI, service instructions. FC-5700 (an FC-R7000 predecessor) example. The information in these documents is increasingly bundled into the dealer manuals instead, perhaps because Shimano thinks only a dealer should work on your bicycle.
SM, service manual. In-depth maintenance instructions, e.g. for lubricating an internal-gear hub.
UM, user manual. FC-R7000 example. Nowadays mainly a list of CAUTION and WARNING exclamation marks with such gems as “There is the danger of injury from the tips of the teeth on the chainrings.”
Other manufacturers have their own information portals. Find them and use them.
I keep a list of torque specifications for every fastener on my bicycle, updating it when I change anything. That saves me having to search dozens of documents when it comes time for maintenance.
If you’ve ever had:
a cleat come loose,
a crank come loose,
creaking chainrings,
the threads of your bottom bracket shell or crank’s pedal eye wear down,
a cone self-screw into a cup-and-cone bearing by precession, destroying it
a slipping handlebar,
a rounded bolt head,
a collapse of cable tension,
a crushed cable that sticks in the cable housing when you try to remove it,
… it was likely caused by incorrect torque. So is a large percentage of the problems I see on bicycles.
Torque is used as a proxy for fastener tension even though an unknown amount of tightening work is wasted on friction. Over a hundred factors affect this friction, including thread material, finish, wear, cleanliness, and state of lubrication. The tension developed by a given torque is therefore impossible to know. Nonetheless, industry has come up with a multiplier called the nut factor to roughly account for these variables in an empirical way. This is incorporated into the manufacturer’s torque specifications.
A problem remains. It’s not enough to buy a torque wrench. You must use it correctly. Does that remind you of anything else in cycling?
Choosing a torque wrench for bicycle use
A variety of torque wrenches are available including screwdriver models, click-type ratcheting wrenches, electronic models with strain gauges (as in power-meter cranks), beam-type torque wrenches (not to be confused with deflecting-beam torque wrenches even though their beams deflect), and many others.
Torque values on bicycles cover at least the range of 0.7 Nm to a massive 150 Nm, although the most common and important specs are between 4 Nm and 70 Nm. Shimano Hollowtech II crank bolts are usually 12–14 Nm, an awkward value for many torque wrenches. Torque wrenches of interest for bicycles have a male square drive of:
¼" for low torque, e.g. stems
⅜" for intermediate torque up to bottom brackets in a pinch
½" for the highest torque on a bicycle, e.g. certain freehub bodies.
However, adaptors are available to use the wrong size of bit socket with any of these drive sizes.
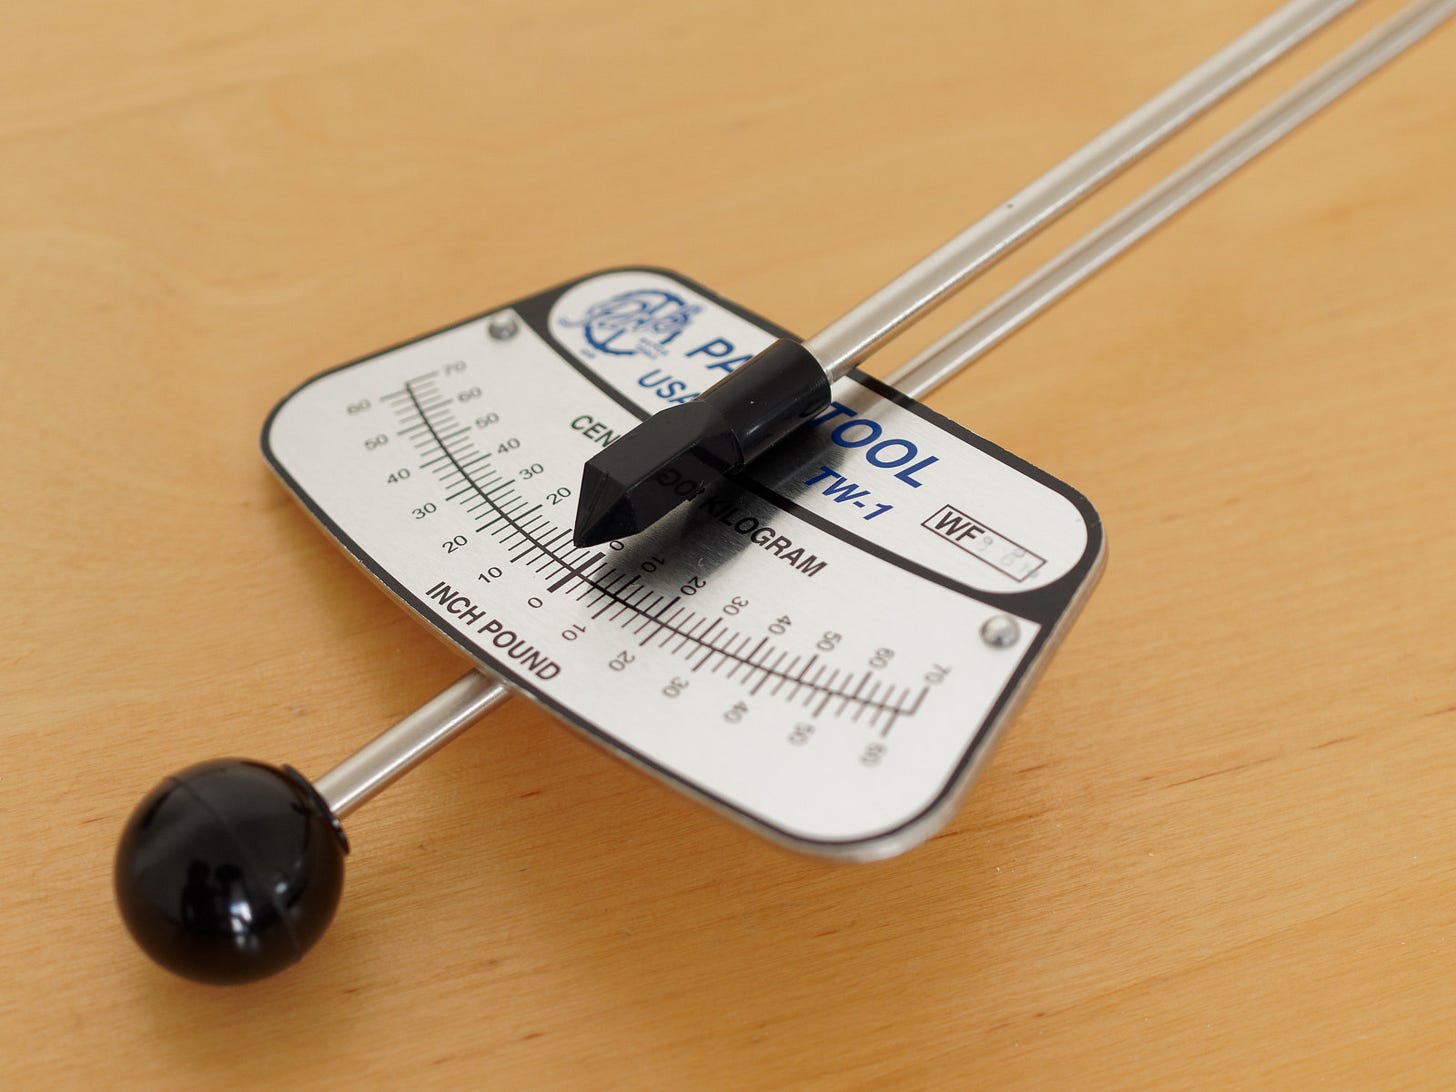
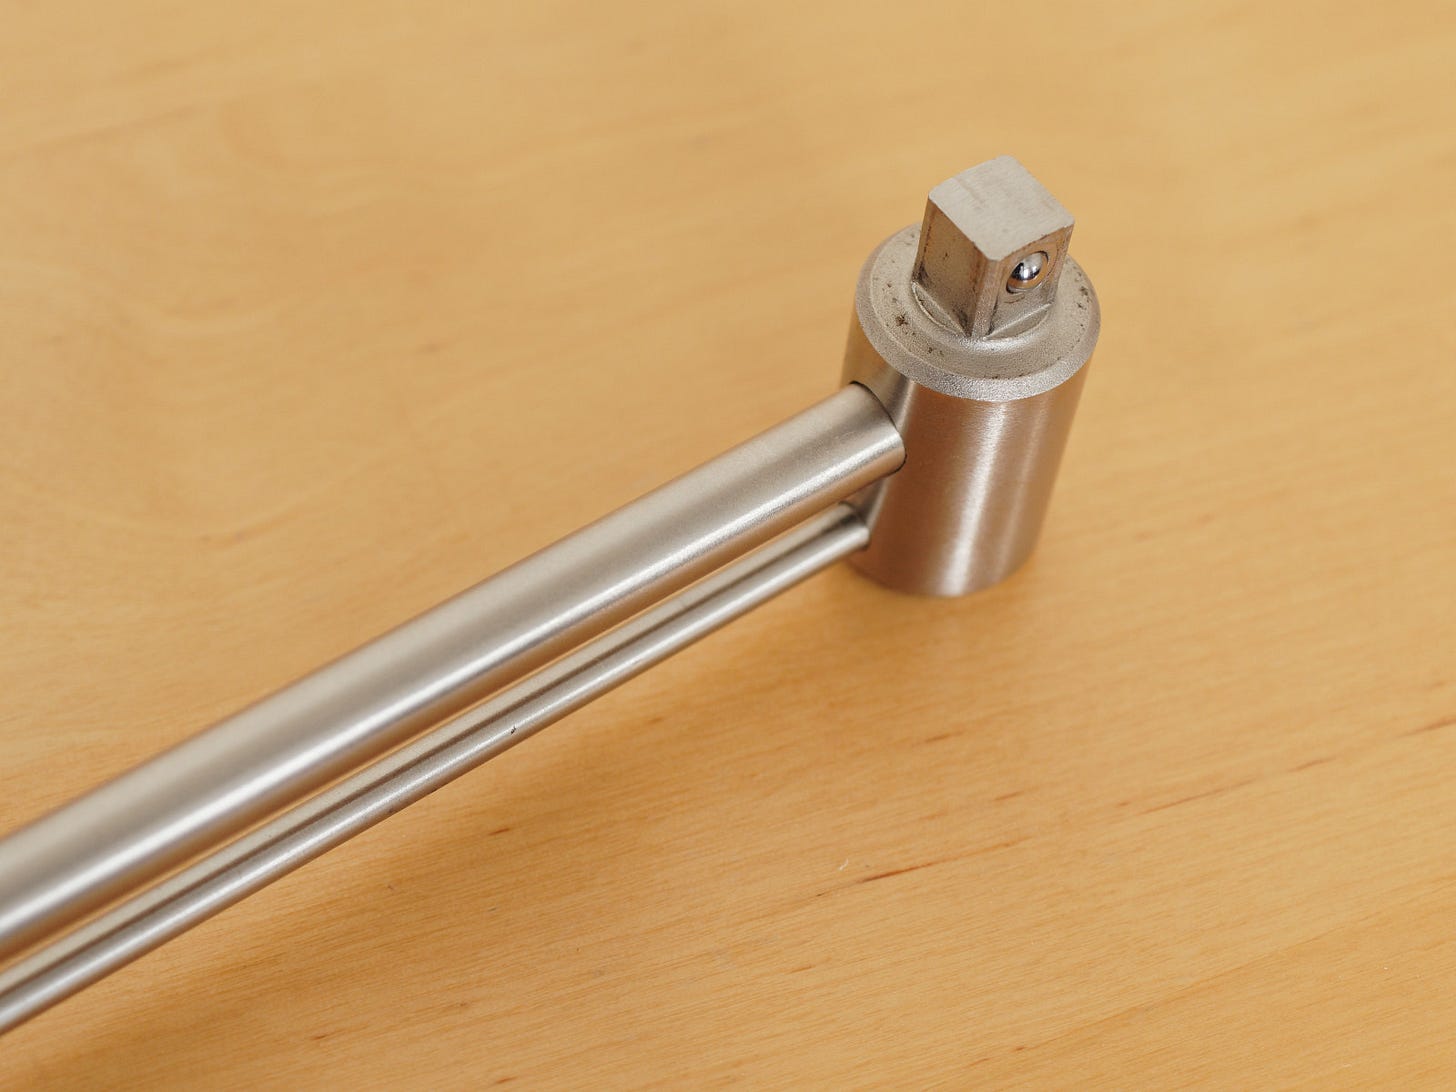
Beam-type wrenches such as the discontinued Park Tool TW-1 and TW-2 are inherently accurate because they have no wearing parts and they follow the immutable Hooke’s law. (There’s that elastic steel again!)
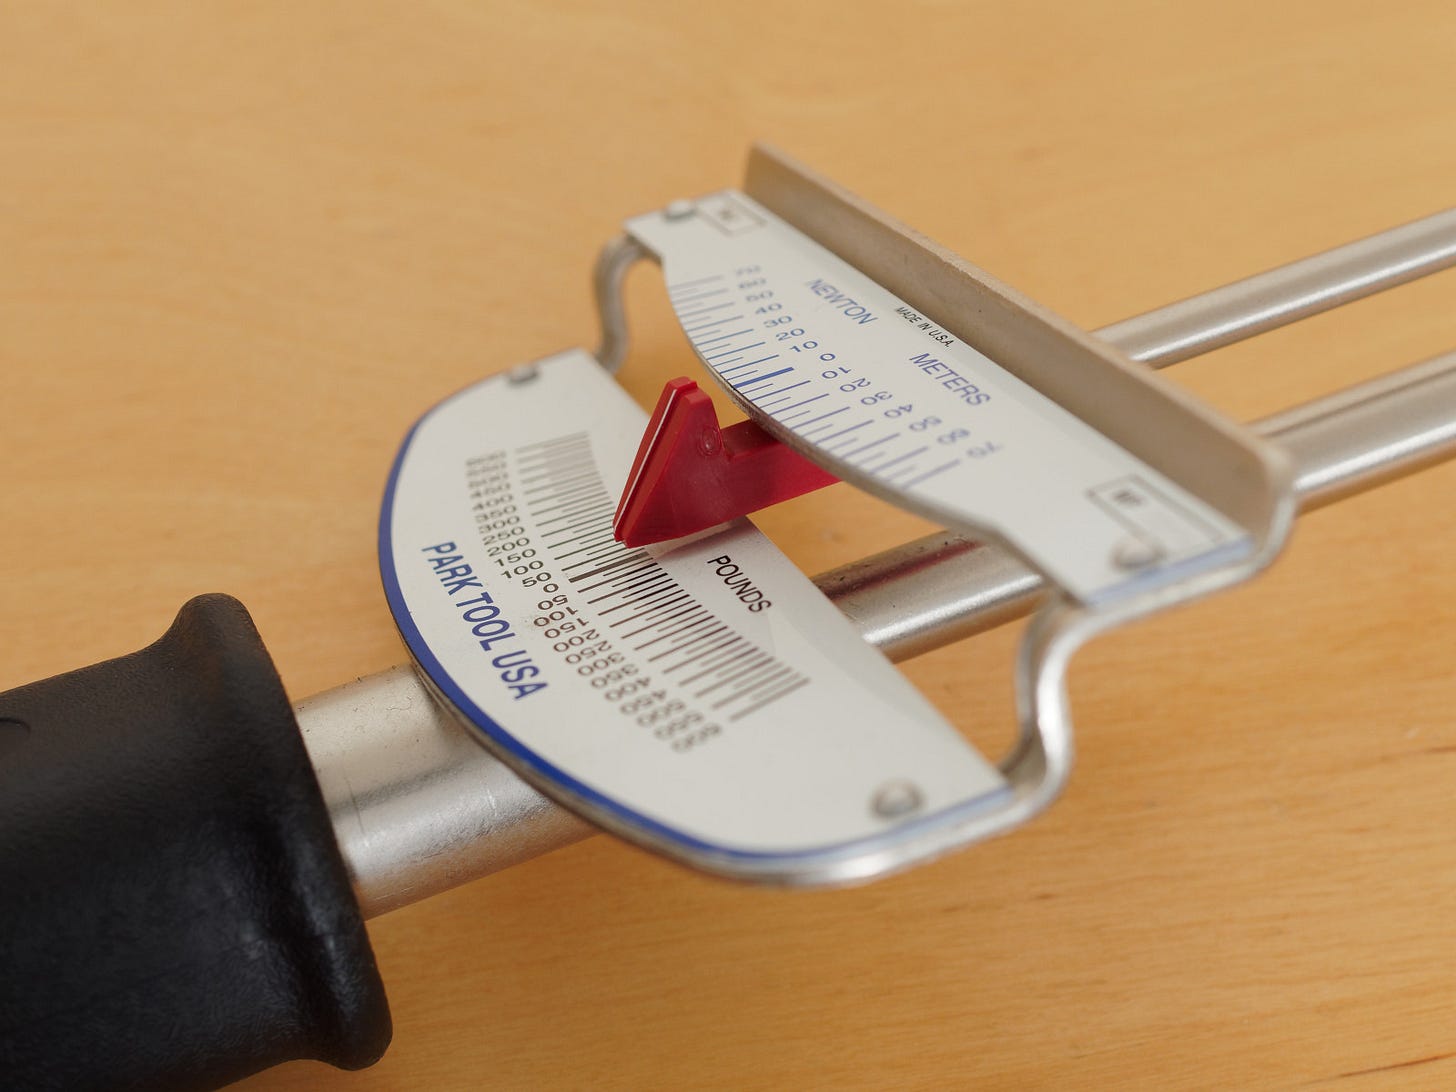
They have two beams: one that acts as a handle at a known distance from the fastener and another that remains stationary. The relative movement of the two beams is read off a scale on one of the beams. Like so:
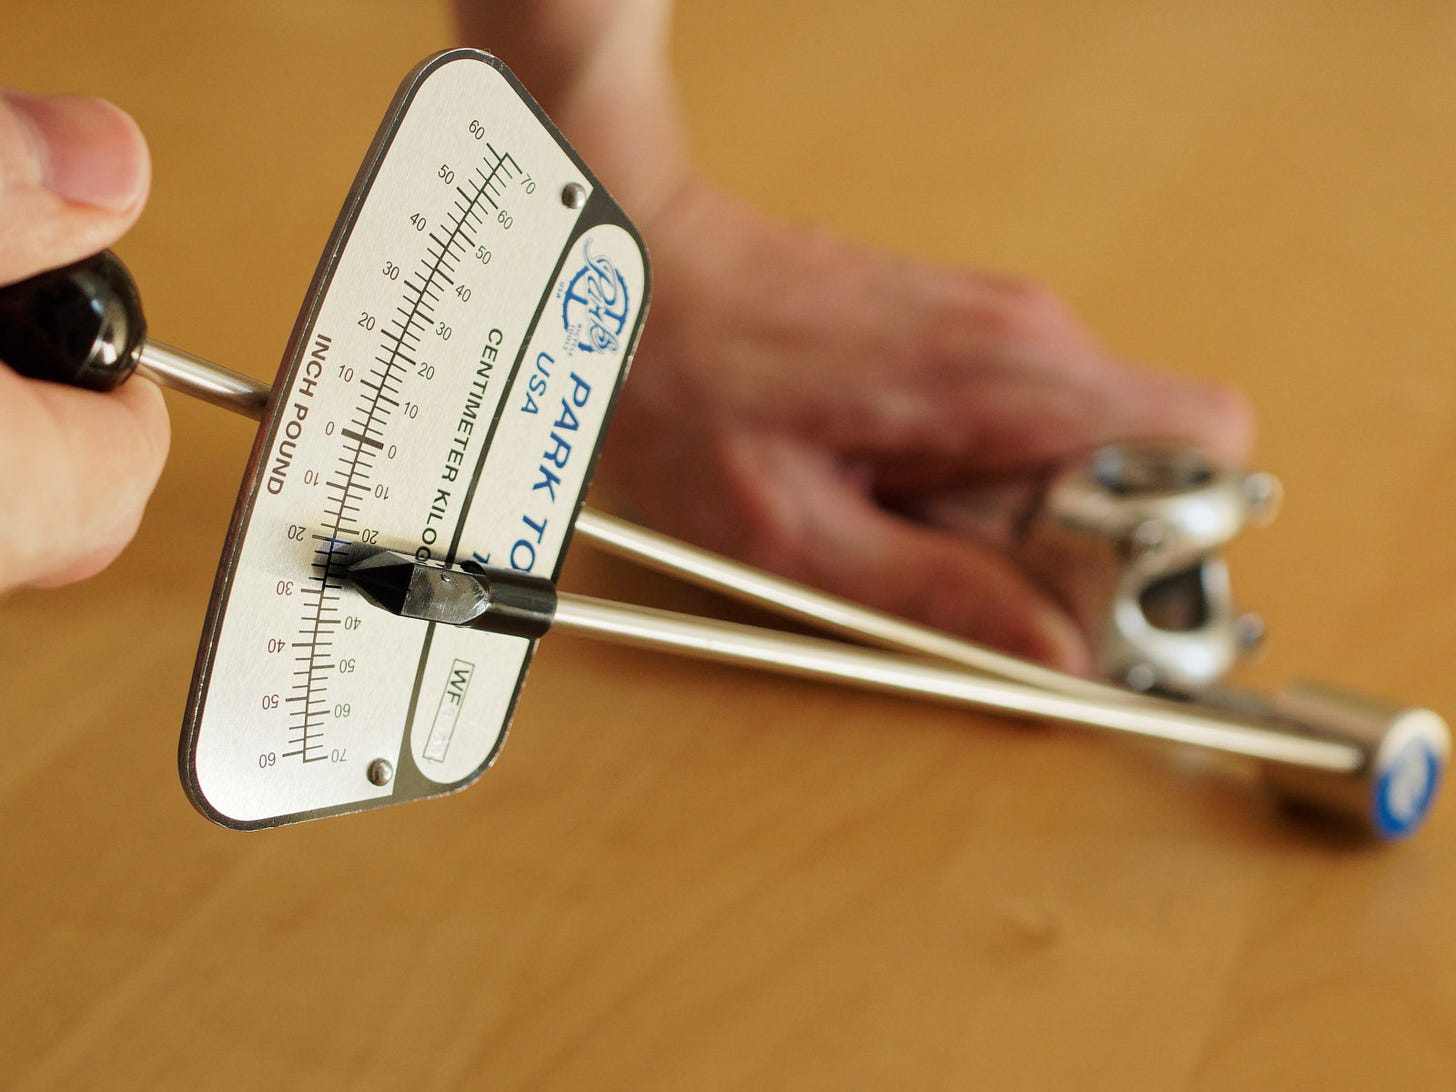
Care must be taken not to touch the beam beyond the black handle. This is difficult while holding a stem against a table and taking a picture with your nose.
Smaller beam wrenches like the Park Tool TW-1 have a tiny handle (the spherical black knob) so that all force is applied at a known distance from the fastener. Larger ones often have a pivoting handle instead:

This is the full pivoting motion of the handle of the Park Tool TW-2. If the handle hits the beam (as in both positions in the animated GIF), some force is applied there instead of at the pivot, reducing accuracy. The range of motion shown is not enough to conveniently make the large final swing arc that must be used with a torque wrench – more on that below.
Advantages of the beam-type torque wrench include:
inexpensive
does not go out of calibration (if a beam bends through misuse, just bend it back to zero on the scale)
durable: no moving parts and comparatively good resistance to impact (drops)
inherently accurate
can measure low torque values compared to maximum capacity, albeit with compromised precision because of short needle travel on scale
works in both clockwise and anticlockwise directions (useful for left pedals and bottom brackets)
can read prevailing torque (more on that below)
lightweight: good for travelling, especially flying.
Disadvantages:
it can be hard to position your head to read the scale while setting the fastener
the handle is often at an unsuitable angle for generating smooth force, because there is no ratchet head. Sometimes you need to remove the socket and rotate it on the square drive to get a more convenient angle (the interaction of the square drive and six-sided bit creates multiple positions)
there is no signal that the desired torque has been reached. You have to watch the scale in real time and stop when you think the fluctuating needle is at the correct value
imprecise, because the scale is short and reading it is subject to parallax error
demands more skill of hand than other types, because force must be applied at one spot on the handle, in the right plane lest the beams touch or diverge, while swinging the handle in a smooth arc and sighting the scale perpendicularly.
Click-type torque wrenches require less user skill and generally offer greater precision, so they have become popular despite their higher cost. My Expert by Facom (should be Expert by William) E100105 is of this type.
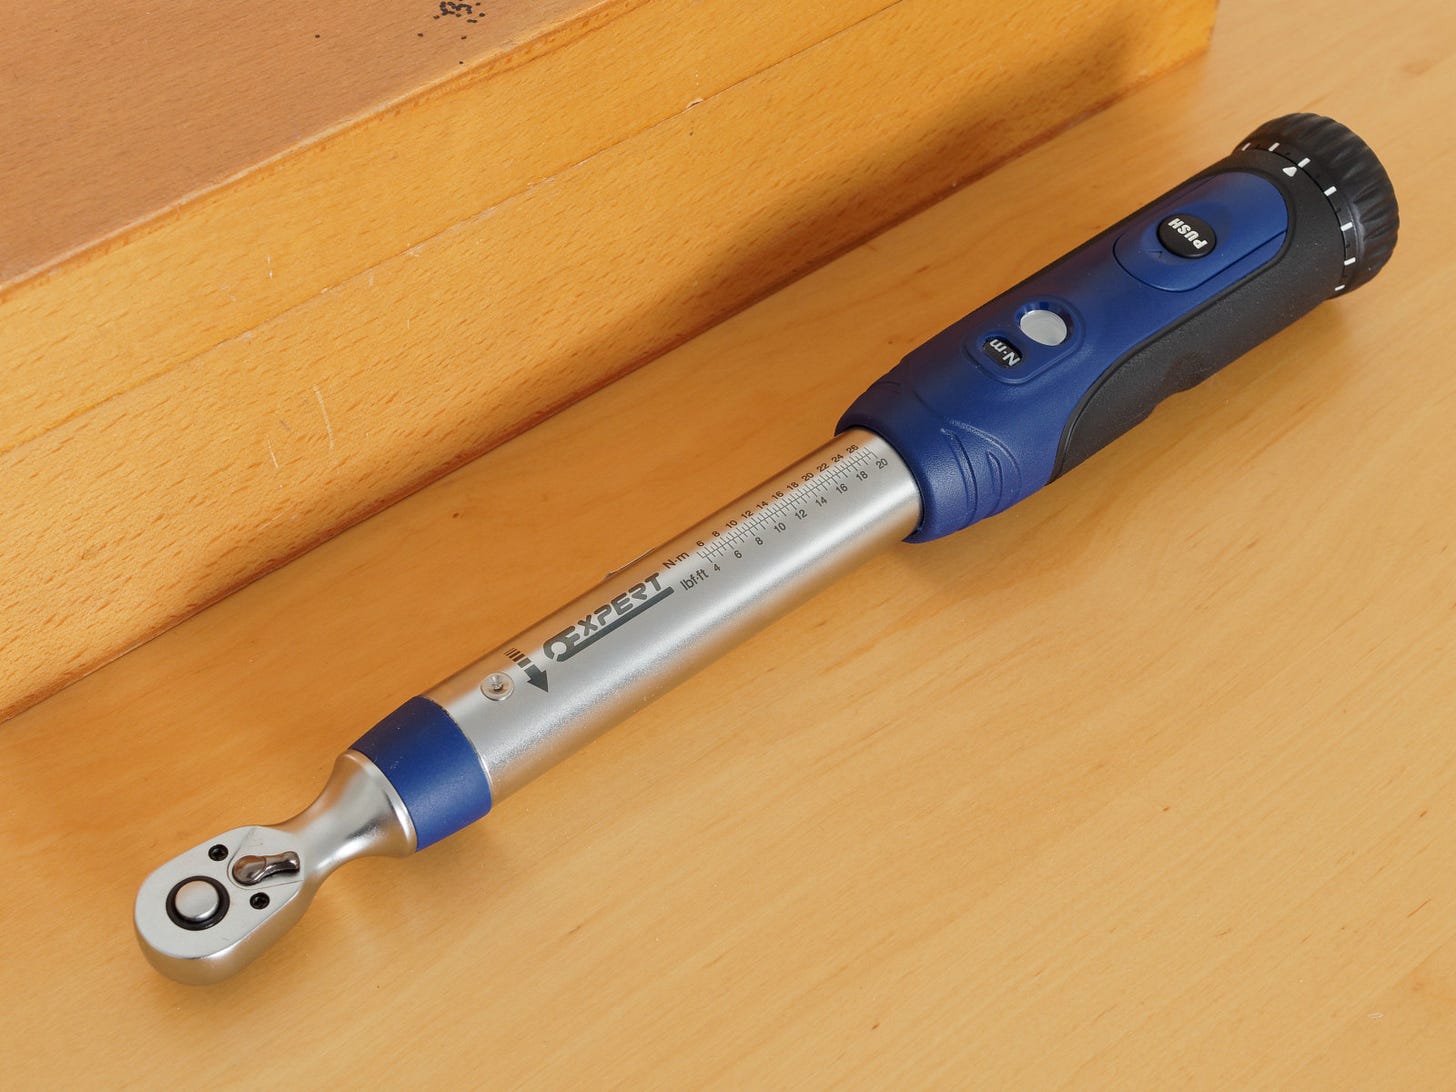
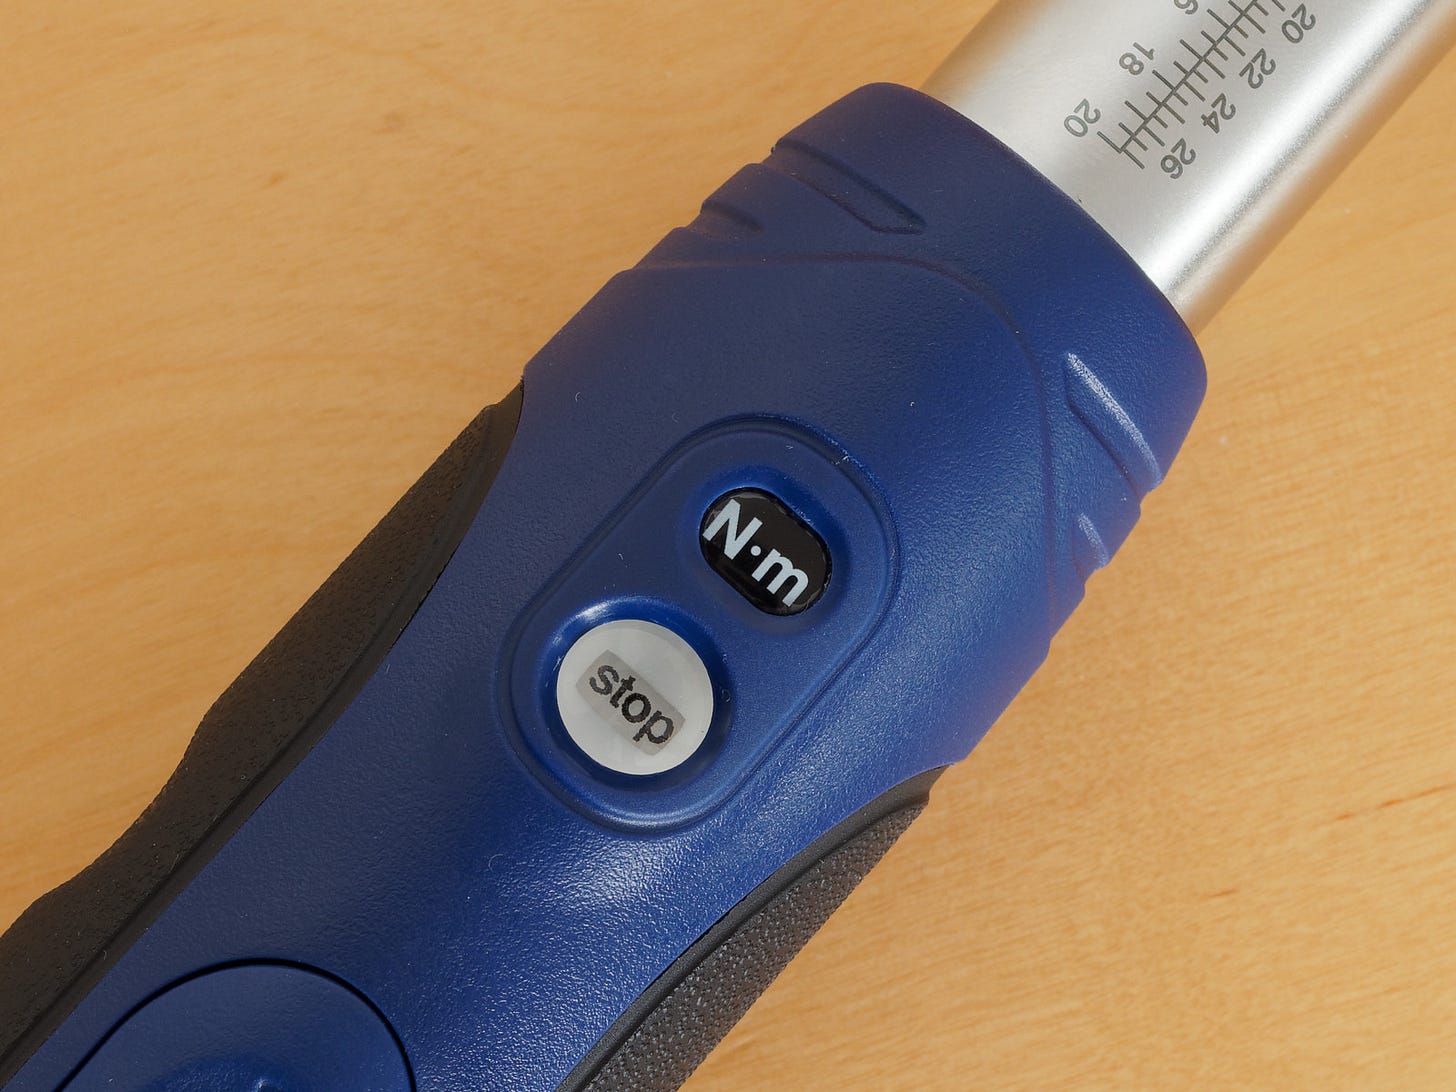
These tools have a way to set the target torque (usually a screw at the bottom of the handle) and an internal mechanism with a spring and low-friction levers that suddenly releases – with an audible and tangible click – when the torque setting is reached. The Expert E100105 bends at the blue band of rubber (a seal) near the head when this snap occurs.
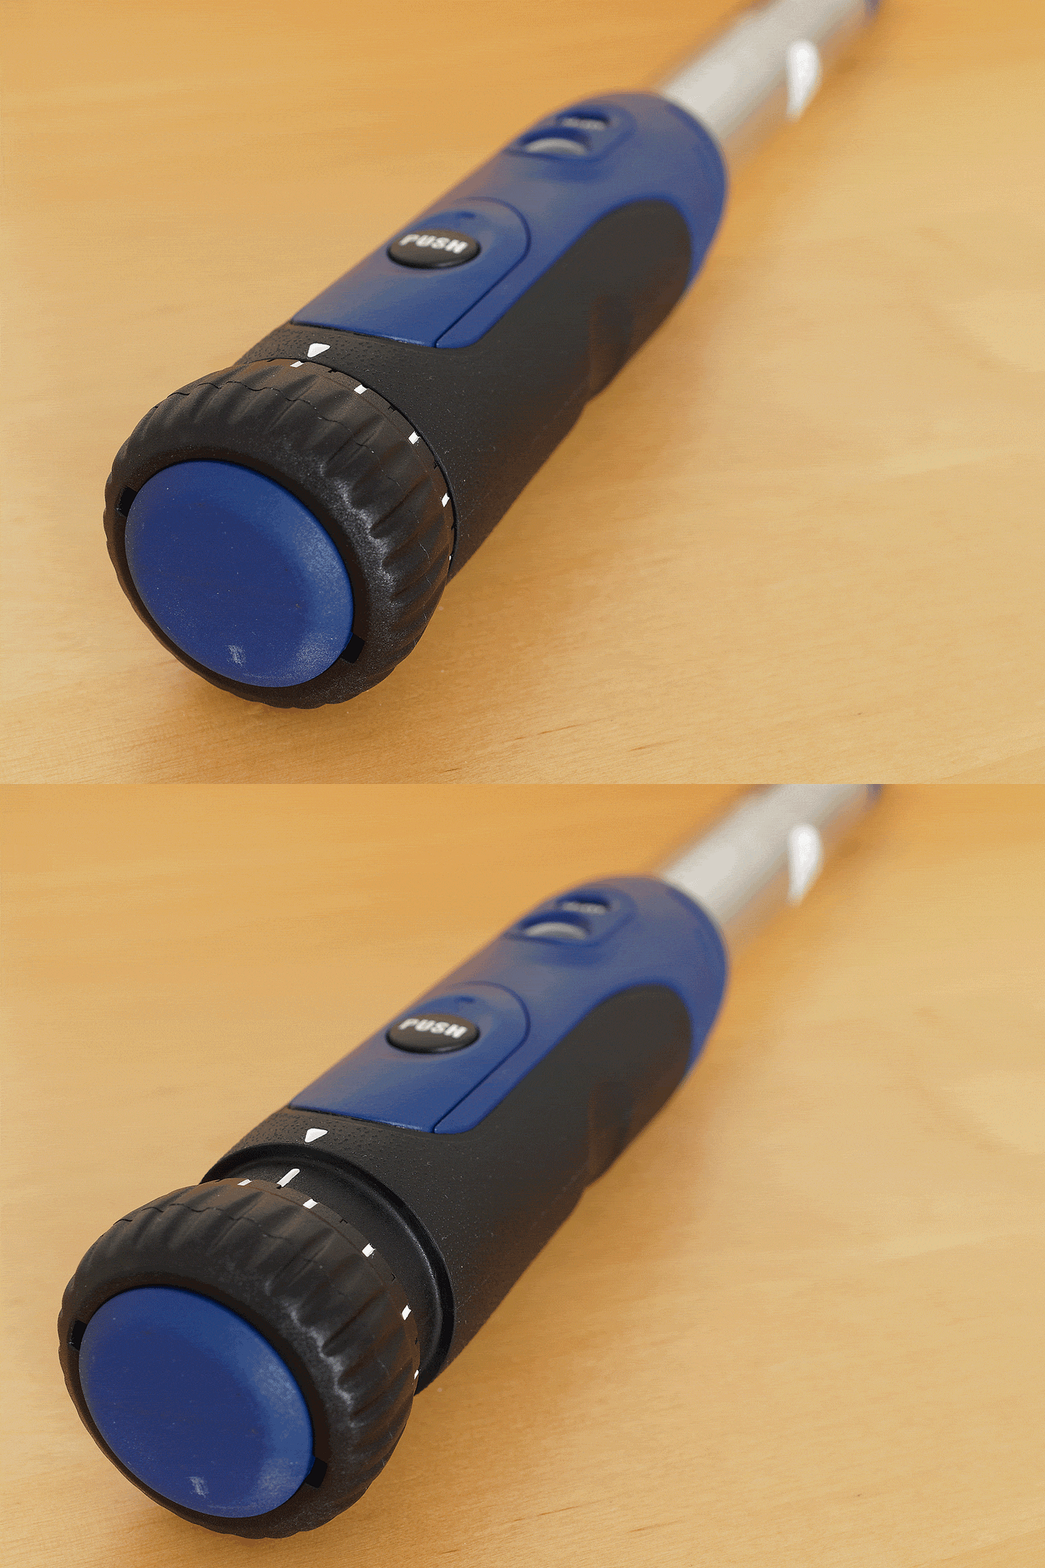
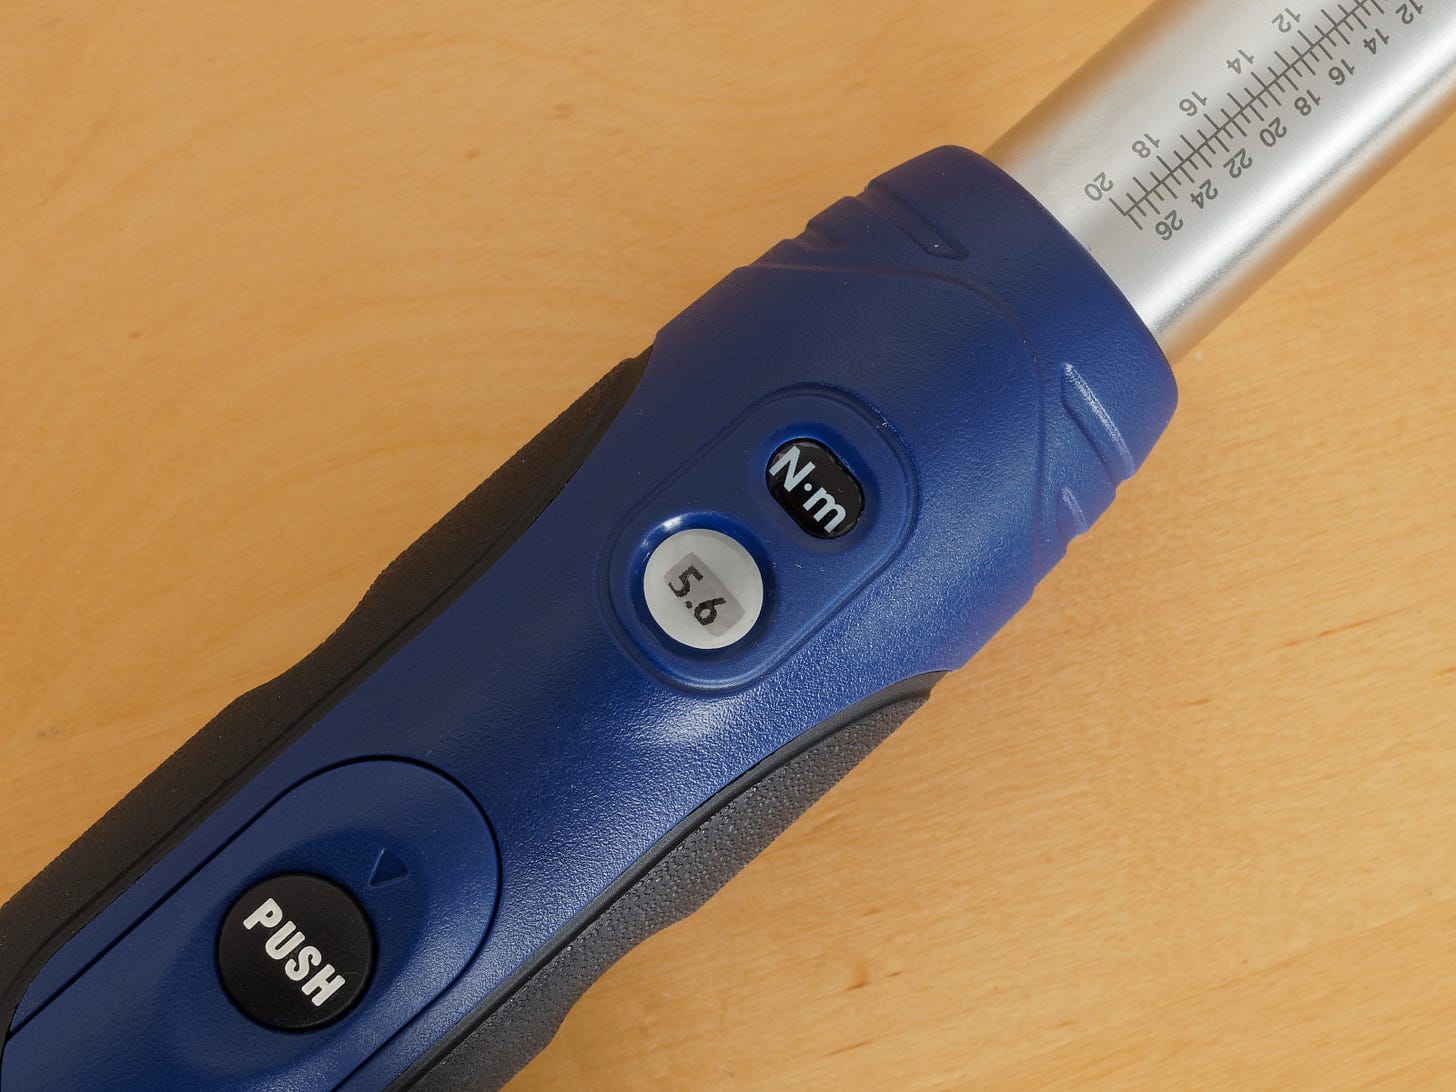
On this model, the bottom of the handle comes out when a button is pushed, unlocking its rotation. You turn the knob until the desired torque value shows in a magnified window, then snap it closed again. The dubious benefit of this rigmarole is that, when you pull the wrench, you don’t turn the knob and accidentally change the setting (which is at 5.6 Nm below).
Other click-type torque wrenches work in slightly different (usually simpler) ways.
Advantages of the click-type torque wrench include:
the click is reassuringly definite, a binary event. There is no guesswork while looking at a scale
working at high torque or with difficult access is easy: you can feel and hear the click wherever your head is positioned
the typical ratchet head allows the handle to be quickly positioned at the most convenient angle
accuracy is higher, in practice, than with beam-type wrenches.
Disadvantages:
expensive
requires periodic calibration for high accuracy, because the moving parts wear and the lubrication changes with time and use. Often calibration every 5,000 cycles (above 80% of torque) or every 20,000 cycles (at mid-range torque) is specified. But that is a lot of cycles for a home mechanic
delicate. Can easily go out of calibration or break if dropped
usually measures torque in only one direction (clockwise)
small working range of torque
accuracy is poor below about 20% of the maximum torque capacity
must be exercised before use after storage (more below)
should be stored at the minimum torque value on the scale but not below this. Too low risks the parts unseating and reassembling in another position the next time, leading to incorrect torque values. Meanwhile, setting the torque from below each time avoids accidental over-torquing and removes any error in the target torque arising from hysteresis in the setting mechanism. (The more common reason given for this instruction is that the spring will take a set if left compressed. If spring steel aged in this way, derailleurs would stop working and cars would sink to their suspension stops while parked, among countless other examples to the contrary)
no indication of prevailing torque
often heavy, although some bicycle-specific models are fairly light.
Electronic torque wrenches are the third common type in bicycling. These measure the flex in an elastic steel (again!) handle using strain gauges. A digital display is used to show the target torque, instantaneous torque, or peak torque after the fact. Sometimes a row of LEDs shows the progressive arrival of the target torque. A speaker beeps at the set torque, and some models vibrate.
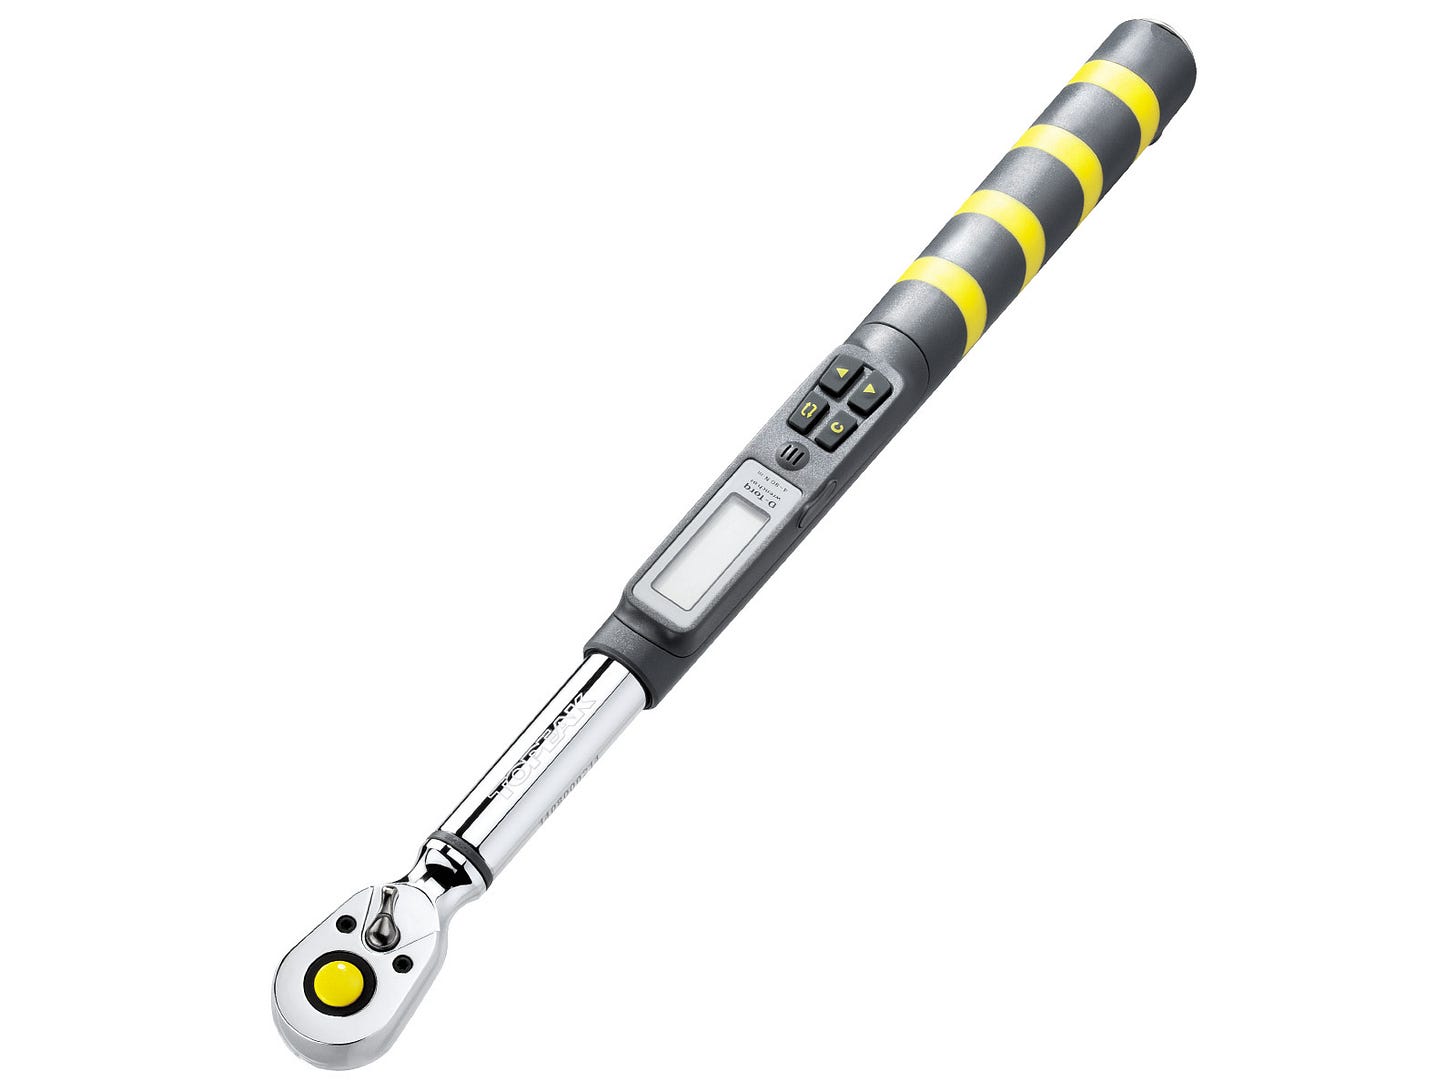
Topeak D-Torq DX electronic torque wrench (4–80 Nm, ⅜" drive)
Many have additional features of little interest to home mechanics, such as a record of cycle counts, angle measurement (I’ll get to that too), or a memory bank for the peak torque of the last few hundred fasteners.
Advantages of the electronic torque wrench include:
high accuracy
high precision
torque units (e.g. Nm, pound-foot) can be changed at the press of a button
may display the exact achieved torque after setting a fastener
less likely to go out of calibration than click-type wrenches
clear signal at target torque and no need to see display while swinging
ratchet head allows optimum handle angle
can usually measure both clockwise and anticlockwise torque
large useful range, because strain gauges are accurate even at small fractions of maximum capacity
no need to exercise prior to use
indication of prevailing torque
often measures angles (useful for cars, etc., if you do that kind of work too).
Disadvantages:
very expensive
requires a battery
requires benign storage conditions
delicate buttons and display although the basic mechanism is durable (strain gauge with no moving parts)
beeping and buzzing are still not as reassuring as the snap and 5–10° free movement of a click-type wrench. Some models (e.g. Snap-on TechAngle) beep shortly before the target torque, but that assumes a constant swing rate and user reaction time
shorter life due to electronics.
So, how to use a torque wrench
Let’s assume a click-type wrench, like my Expert E100105, since that is the most common type.
Clean the male and female threads of the fastener.
Check the threads are not visibly worn or burred.
Clean and, usually, lightly lubricate the mating surfaces of the parts.
The bicycle is a greasy environment and the slightest hint of grease on a screw thread counts as lubrication, since that’s all that remains at high contact pressures anyway. If torque specifications were intended to be for dry parts – which would result in more variability of the nut factor – the manufacturer would specify a cleaning method. This is what I believe although there is some debate about it. I assume the lubricated state, as typical in industry, unless otherwise specified. So lubricate the thread and underneath the bolt head.
If you haven’t used the torque wrench earlier that day, it must be exercised (clicked) five or six times (not applicable to beam-type or electronic wrenches). This is ideally done at the wrench’s maximum torque, but target torque gives most of the benefit and may be easier to do. This replenishes lubricant on the sliding internal surfaces and breaks up any corrosion, returning the wrench as closely as possible to its calibrated state. Traditionally the torque wrench is exercised by clamping the square drive in a smooth-jawed vice, but it’s easy to find alternatives if you can’t do that. A fastener on the bicycle that will definitely not move at the target torque (so usually a much larger one) is a reasonable substitute. Fit a socket for that fastener and exercise the wrench half a dozen times.
Set the target torque and lock the setting if necessary. If the part manufacturer specifies a range, for example, 12–14 Nm, use the middle value (13 Nm here) and cross your fingers that your torque wrench and technique are accurate enough to fall within the range.
Fit the socket needed for the final fastener.
Spin down the fastener until it is snug using another tool. Or do it laboriously with the torque wrench.
Hold the wrench at the centre of its grip. Click-type wrenches are not as sensitive to bad hand position as beam types, but it still matters.
As you approach the target torque, swing the wrench smoothly and firmly while adopting whatever acrobatics are needed to maintain your hand on the designated grip area.
If the fastener starts creaking or sticking and slipping (jerking), abandon the exercise, remove the fastener, clean and lubricate the threads again, and if necessary replace the fastener. Accurate torque measurement is not possible in the presence of stick-slip.
The final swing of the wrench to set the fastener must be large, ideally a quarter of a turn. Since you can’t always predict the angle at which the target torque will arrive, it is sometimes necessary to bump into the target torque, back off the fastener (with another tool), and repeat with the handle in a convenient starting position for the final large swing.
That final swing at last. It should be smooth and slow. How slow? The engineers who produced the torque specification expected about 20 degrees per second. That means the last quarter of a turn should take over four seconds. High speeds cause galling and other variable problems.
Swinging slowly has another important advantage: it means you’re less likely to overshoot the free range of motion after the click, tightening the fastener by another unknown amount. The moment you hear and feel the click, immediately stop pulling the wrench. Studies have shown that too many mechanics pull through the click and over-torque.
Remove the tool from the fastener and back off the torque to the storage setting.
You’re done already!
A few other things:
Never exceed the wrench’s breakaway torque (the setting at which it clicks).
Never exceed the wrench’s maximum capacity.
Never use the torque wrench to break fasteners loose.
It should be obvious from the above discussion that you should never use a cheater bar on a torque wrench.
Take great care not to drop the torque wrench.
IMPORTANT! You can’t check the torque of a fastener without turning it
It follows that you cannot use a torque wrench to check that a bolt on your bicycle hasn’t worked itself loose. Sticking friction may prevent the bolt from turning even if its tension is much lower than it should be.
To check torque, you must in fact start again. First break loose the fastener and then set it with the long final swing described above. The fastener must be turning smoothly at 20 degrees per second when the final torque is reached. No exceptions!
If you need to check whether a fastener has worked loose, give it a witness mark and compare before and after re-torquing.
Setting multiple fasteners
Often, bolts or screws on bicycles are tightened in pairs, threes, fours, or even fives. In these cases, you should alternate between them to evenly clamp the part. For example, here is the prescribed star pattern for a Ritchey Classic stem I purchased a few years ago.

In these cases, a balance must be struck between tightening the fasteners evenly and achieving a long final swing on each fastener. Use your judgement, but make sure the wrench is still moving at about 20 degrees per second when the target arrives.
Prevailing torque
When a fastener has a nylon insert, old threadlocker, a tight fit, or corrosion, significant torque may be needed just to spin it down. This is called prevailing torque. In industry, this torque is measured one turn before snug and added to the torque specification to find the target torque.
For example, if the torque specification is 50–70 Nm and the prevailing torque is 25 Nm, the user might aim at 85 Nm.
On bicycles, this is especially relevant for rusty bottom brackets, which have large-diameter threads that cause substantial non-functional torque (non-clamping torque). I add the prevailing torque in these cases. To measure the prevailing torque you need a beam-type wrench or, better, an electronic wrench. A click-type wrench doesn’t work.
The future of torque on bicycles
I mentioned angle measurement earlier. Because of unknowable thread friction, torque as a proxy for bolt tension is being replaced by another method in high-performance applications.
This is the torque-angle method. First, the bolt is tightened to a low snug torque (the start of the clamp) with a conventional torque wrench. Then the bolt is tightened through an additional angle, for example 90°. The angle results in a precise bolt tension, because the stretch obeys the known geometry of the thread with no regard for friction.
This method is used in modern cars because it enables components to be made lighter and more reliable at the same time. I hereby predict torque-angles will eventually arrive in bicycles, not that I’m begging for that.
If you’ve heard of any bicycle application that already uses angles, I’d love to hear about it at bicyclingage@gmail.com. For example, how does Canyon assemble bicycles?
Ask Cecil A Throckmorton
Dear Cecil: How do I stop every ride becoming a race against the clock?—Pedro
Dear Pedro: You have forgotten the profound joy of riding a bike slowly. It is when air resistance is low that the magic of the wheel is most evident.
Model yourself on children. When they ride, they choose a natural pace that permits easy talking. Once in a while, especially downhill, they go as fast as they can. They stop when something distracts them. In short, they do what’s fun because no-one has told them what they should do instead. Yet.
You can do the same, but probably not while recording a ride for Strava. And perhaps not with a speedometer on your handlebar.
You know what to do, Pedro.
∞
Do you need advice, technical or existential, about a cycling matter?
Send your question to bicyclingage@gmail.com with Dear Cecil in the subject line. The secretary will bring it to Mr Throckmorton’s attention before morning tea.
Don’t worry, I know no-one wants to read three thousand words from me very often, even if the subject is as fascinating as bolt tension. Hang in there.
Meanwhile, if you know someone who thinks it’s enough to own a torque wrench, please tell them about Bicycling in the Age of Shopping. Here, we want good things to last, and that means torquing them just right.
Ride bike!
Samuel


