


Our washing machine broke a few weeks ago. That’s the second one not to make it to its fifth birthday.
The first one died when its electronic brain got scrambled and new brains were nowhere to be found. So when we bought a new machine, we paid a little extra to get an Electrolux. That’s a good brand, I thought, so parts should last longer and be available as spares when they break.
The Electrolux succumbed to mechanical problems. Its death throes began with an occasional bang while spinning, and by bang I mean gunshot. At first I thought it was some foreign object running into the drum at 1200 RPM. It didn’t sound exactly like that, but you have to hope.
Then came more shots than could be reasonably explained by the contents of my fiancée’s pockets (and I have found amazing things in her pockets). I had a closer look after an especially violent wash and noticed the drum was free to wander too far off-centre. Bad bearings? Counterbalance spring? Suspension damper? Who knows. I know the drum wobbled more than it should during the spin cycle, shredding adjacent hardware like a giant cheese grater … with sound effects.
I picked bits of washing machine out of the clothes and wondered what to do. I hate throwing away 60 kg of metal and plastic every few years.
You see, spare parts are often available even for cheap washing machines. It’s just that there’s no documentation to tell you what you need. So even if you think you can replace the part yourself, good luck finding a compatible part. They’re not called [your washing machine model] counterbalance spring on eBay. They’re called things like #1327684104 (L73283FL). They might have the word Frigidaire, AEG, Faure, Zanussi, Tricity Bendix, or Westinghouse in the label, because Electrolux owns all of those brands and they all sell the same basic machine with only electronic gimmicks for differentiation. It doesn’t help that eBay sellers keep the dimensions of parts a mystery.
After a few hours of Google research I gave up. I could see this was going to be a deeper rabbit hole than I was willing to enter.
We got a Miele this time. Miele’s pitch is that their machines have a design life of 20 years and guaranteed spare-parts availability for 15 years. That’s something I can get behind.
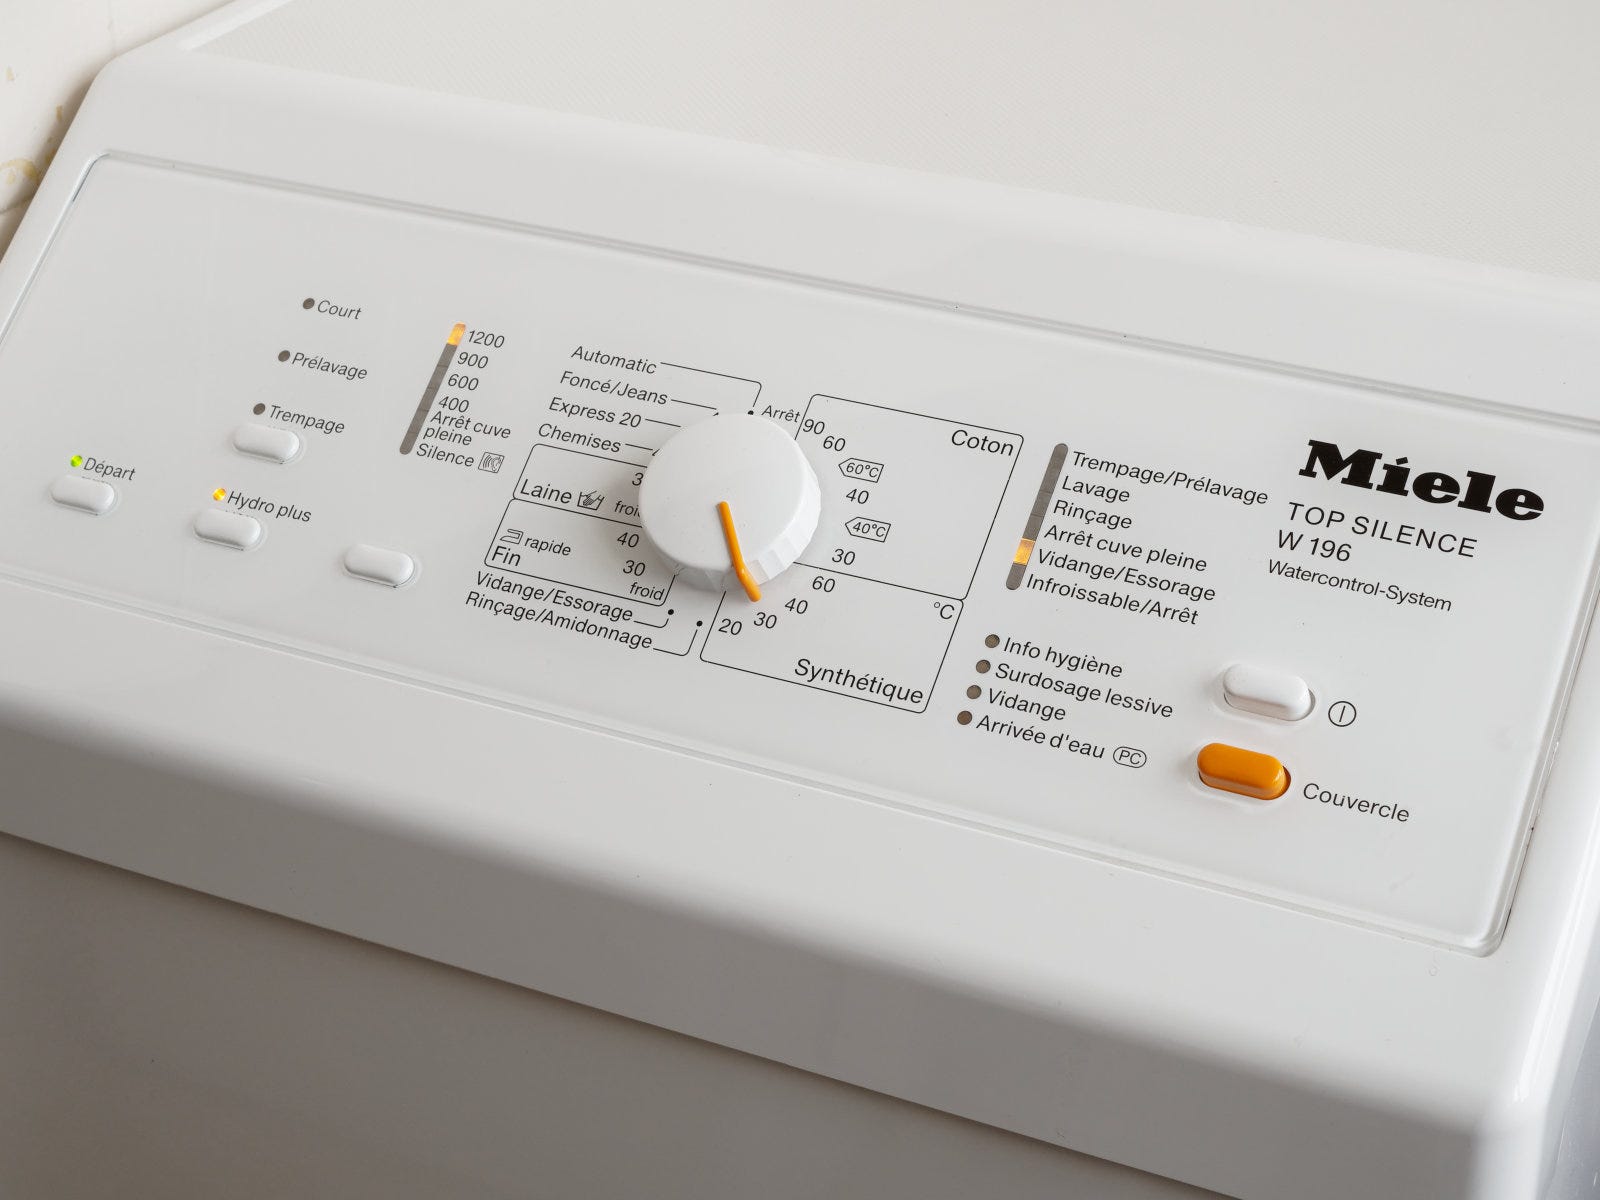
No stupid touchscreen. No stupid touch controls. Tactile push buttons and a clicky dial. A few LEDs for useful info only. Bliss.
But the Miele weighs 95 kg, so here’s hoping it lasts many, many years, like the clockwork-timed washing machines of my childhood.
It’s too late for me, but next year the EU will introduce right-to-repair rules for domestic appliances. Manufacturers will be required to make spare parts available for a minimum of 10 years. Maybe that will arrest decades of decline in the repairability of domestic appliances.
No such legislation exists for bicycles, which have followed a similar development path.
Here’s a page from Campagnolo’s general catalogue #14:
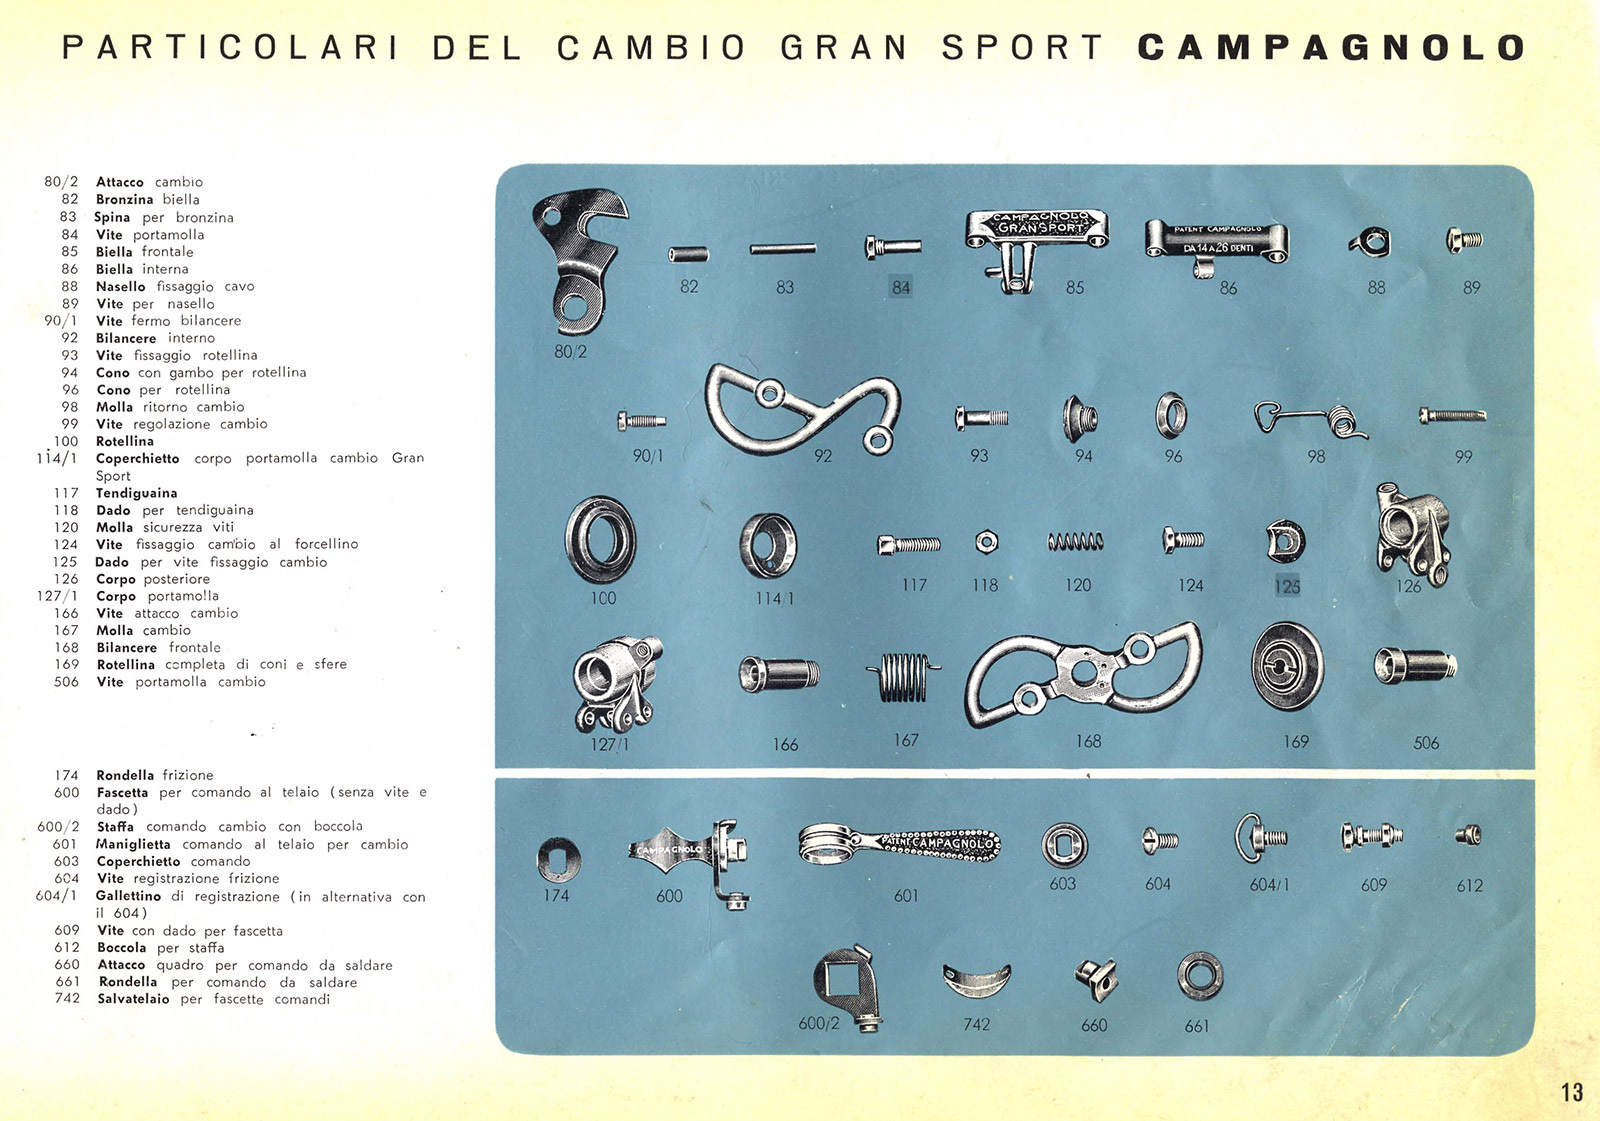
In 1960, spare parts were apparently so important they were highlighted in the sales catalogue. As you can see, every screw, spring, and casting for this derailleur was available separately. Prices for loose parts were reasonable, too. And no exotic tools were needed to rebuild the derailleur.
Below is Shimano’s exploded-view diagram for my bicycle’s derailleur. This RD-7700 model came out in 1996 and was good enough to win the Tour several times, coping well with EPO-fuelled power and cadence:

This derailleur is more complex than the earlier Campagnolo, and many parts are not available as spares. Maybe that’s because there are some press-fitted pins and tricky assemblies in this derailleur. I’ve had mine in smaller pieces than those shown, but it requires effort that a bike shop would not find economical. So?
And here’s Shimano’s latest RD-R8050 derailleur, better known as Ultegra Di2:
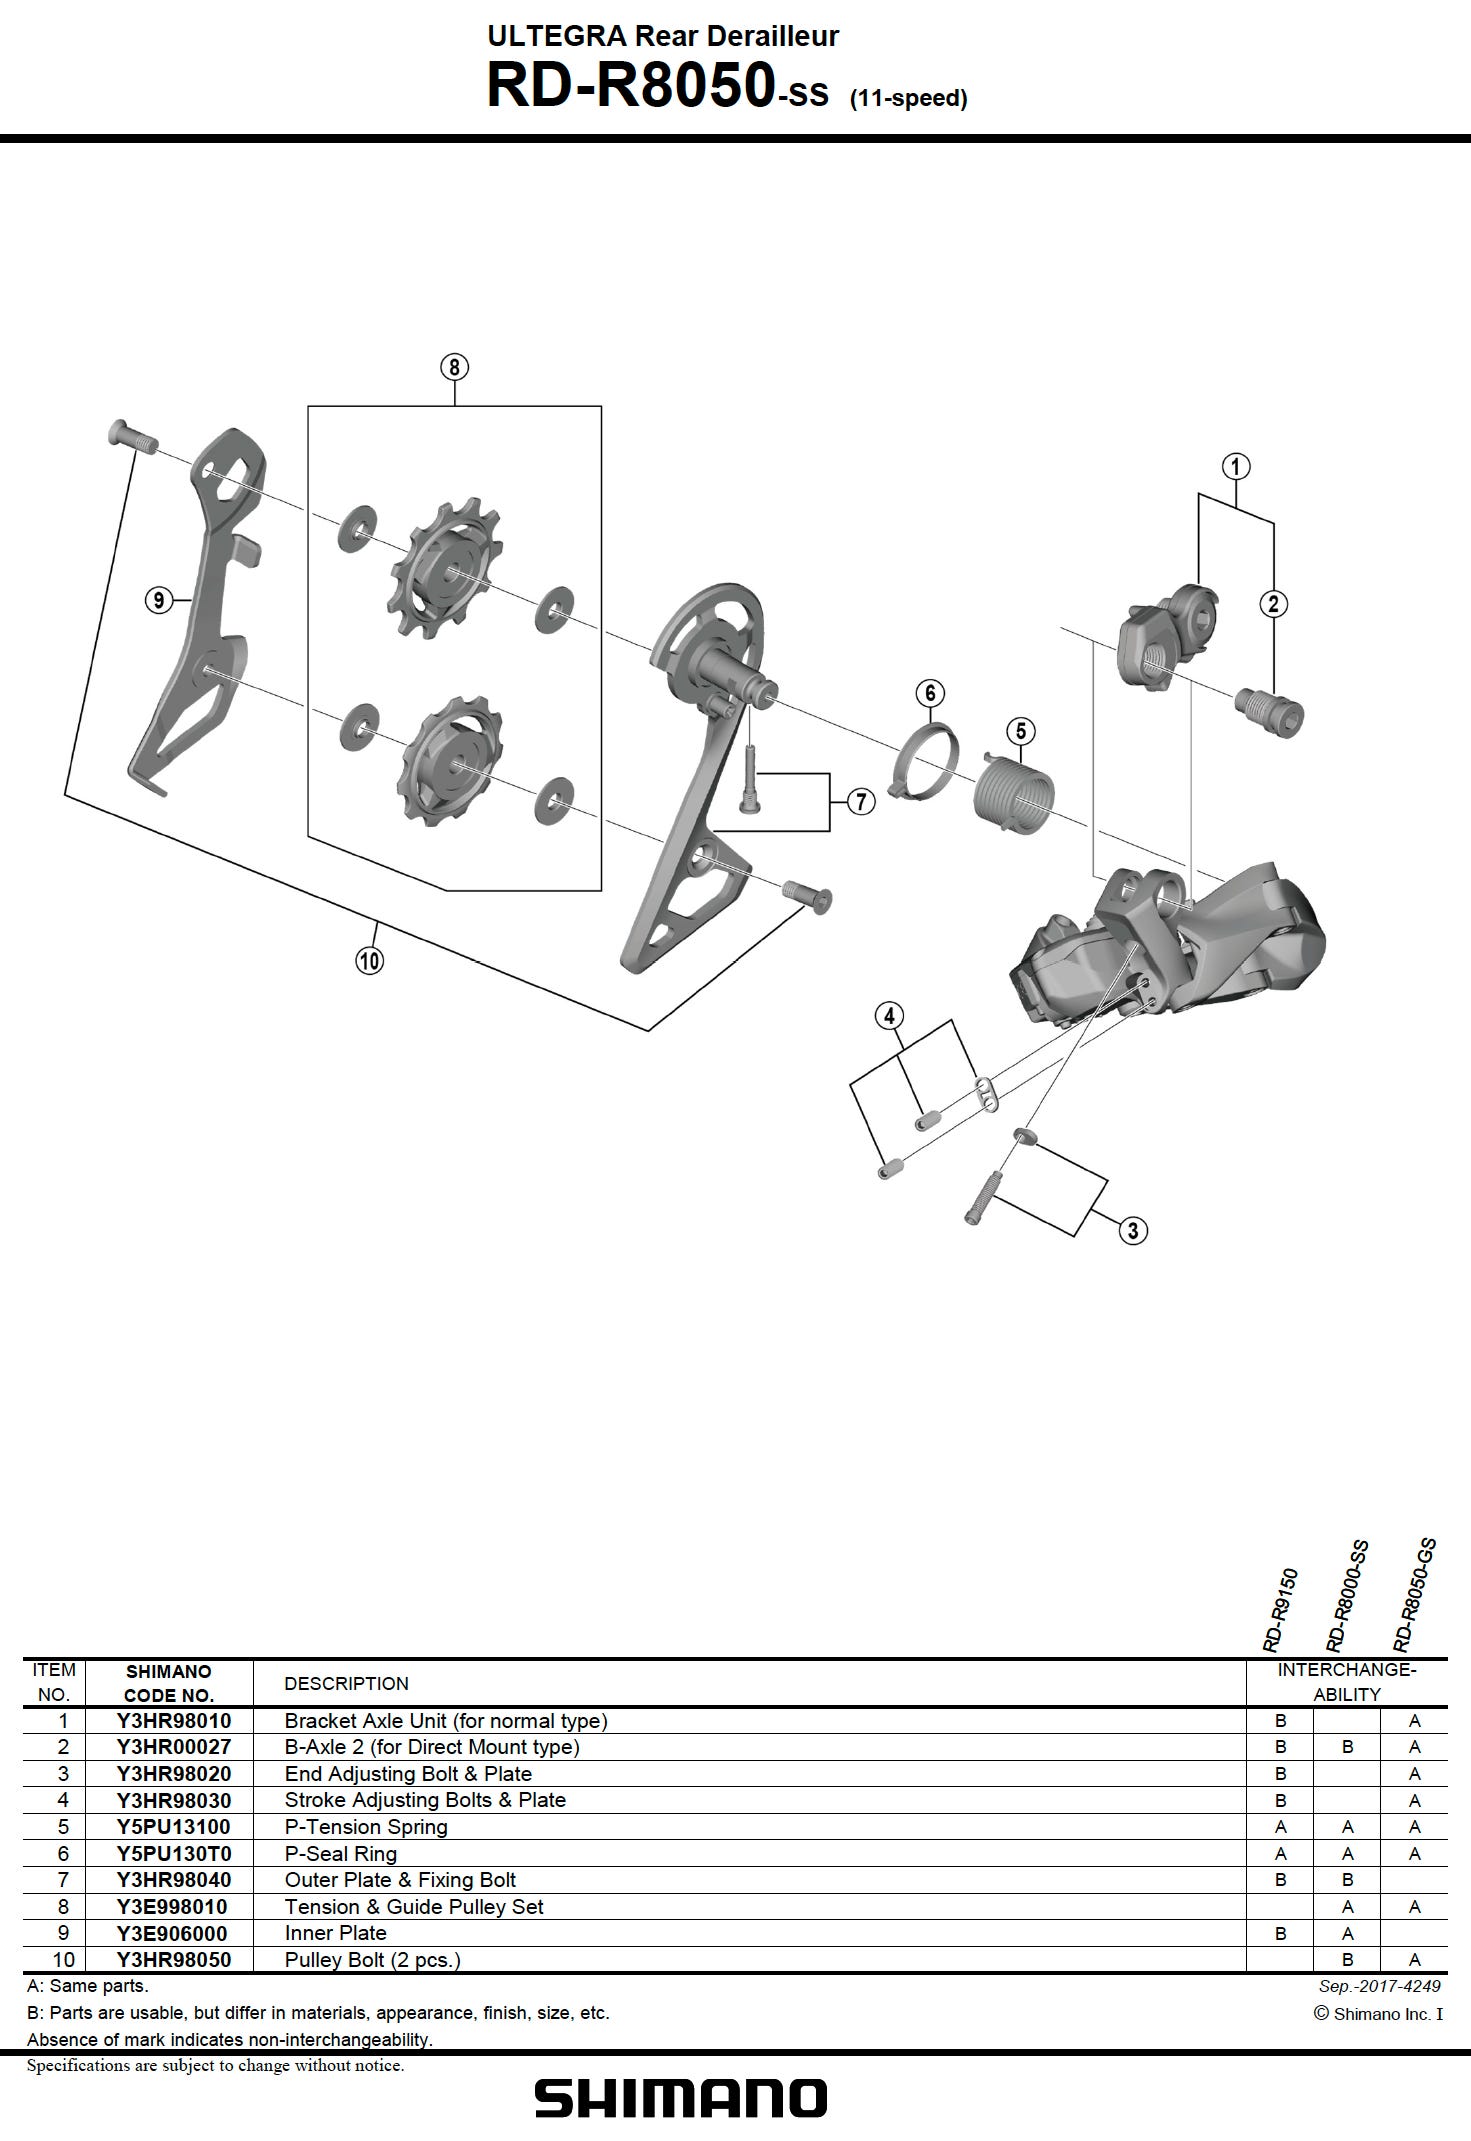
I spy a trend. Complexity has taken another leap, but you wouldn’t know it because the gubbins are now hidden in a black box (literally), with few replacement parts available.
For something as simple as new pulleys, you’re supposed to take your spaceship to the local spaceship shop, assuming Spaceship24.com hasn’t put it out of business. That’s why Shimano puts the pulley-replacement instructions in a Dealer’s Manual. The main replacement part is the whole derailleur. Hey, it’s less than €200, ya cheapskate.
Metrology dept.
In rare news for this newsletter, I have acquired a micrometer. Micrometers and their astonishing gauge blocks are heroes of the industrial revolution, which is to say, forgotten and unknown. Maybe you remember seeing one in high-school physics class. But the micrometer remains a first-line tool in the machinist’s arsenal today.
The layout of the modern micrometer was invented in France by Jean-Laurent Palmer in 1848. A micrometer is often called a palmer in French to this day. In 1867, Brown and Sharpe of the eponymous company visited the Exposition universelle [d’art et d’industrie] in Paris and saw Palmer’s palmer. They liked what they saw and brought it back to America, where they took it to a higher pitch in time for America to replace Britain as the workshop of the world.
By the Henry Ford era, micrometers were expensive but ubiquitous anyway. They earned their keep by making it easier to meet quality targets. Later, Japan reduced the cost of good instruments through further design and manufacturing innovation. And today China makes cheap and serviceable micrometers. Micrometers are one of the key early products of an industrialising country and are essential to all further industrialisation.
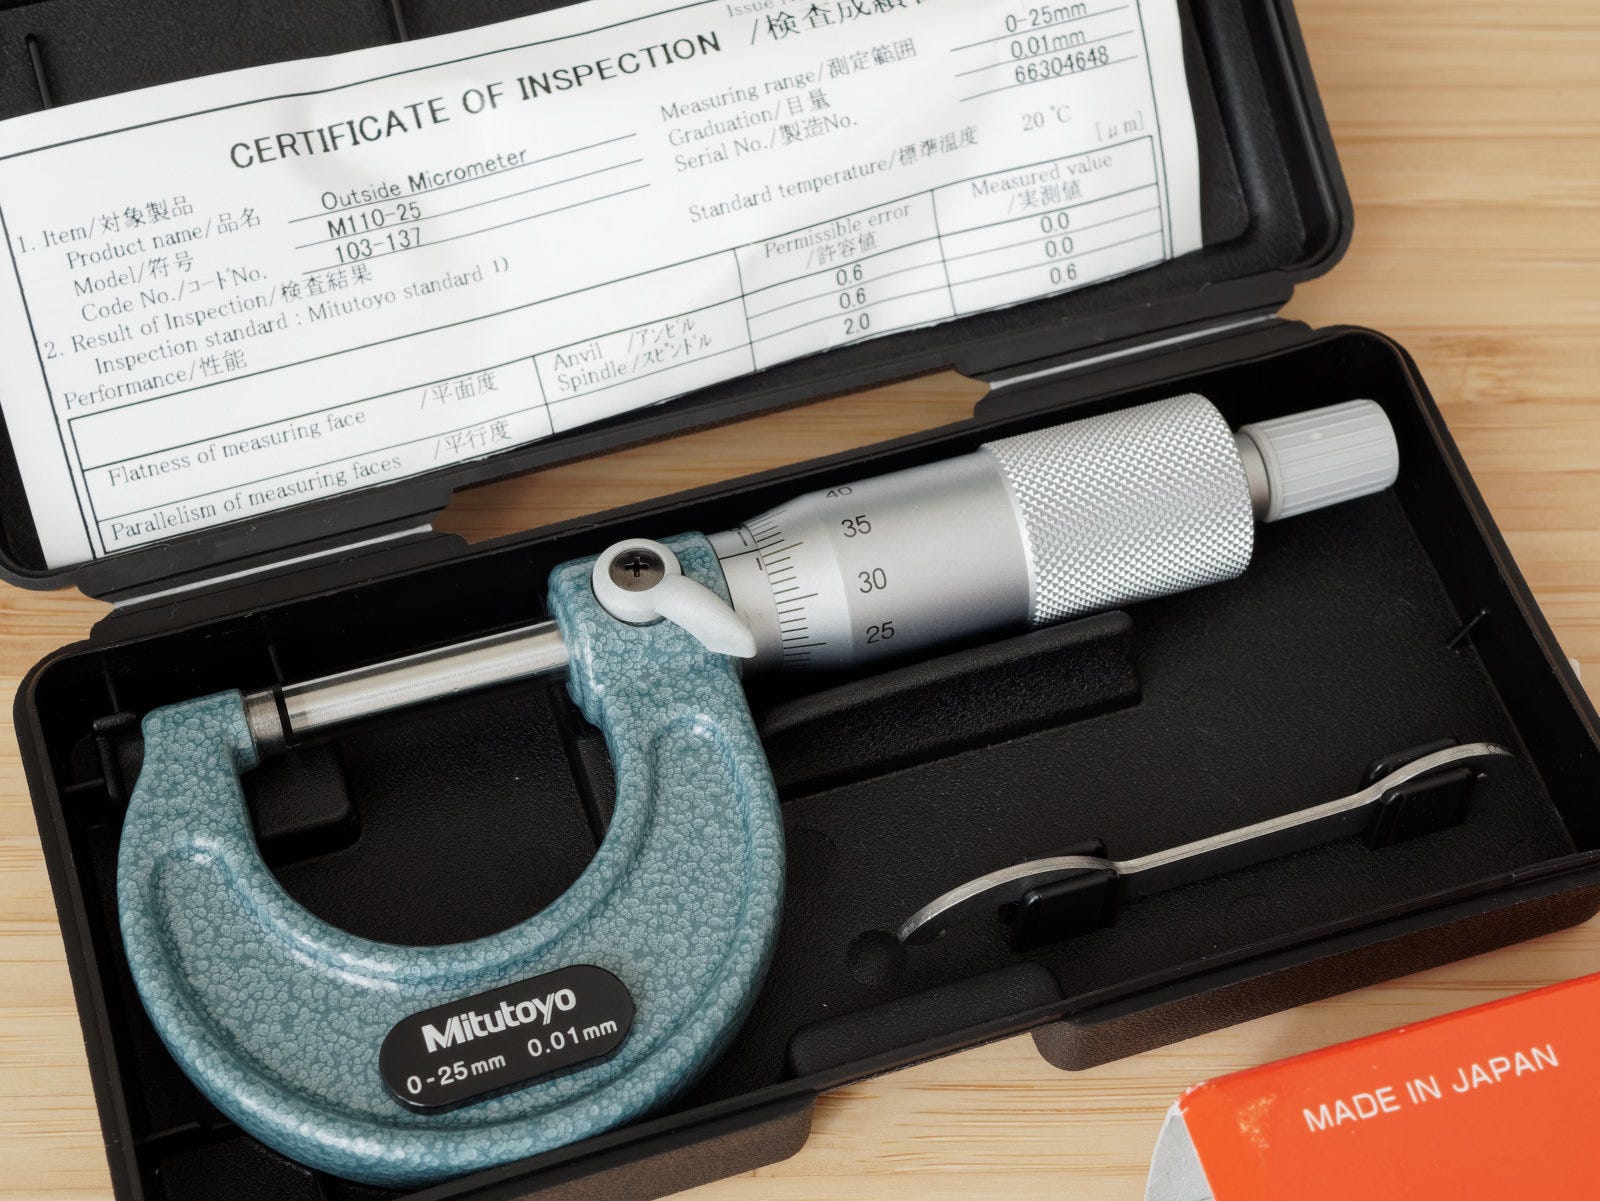
My micrometer is a Mitutoyo 103-137, the least expensive model made by that Japanese company. Mitutoyo is sort of the Shimano of metrology in that it has commoditised quality. I guess my 103-137 lines up with Shimano Claris: inexpensive but utterly competent.
This micrometer is graduated in 0.01 mm increments but accurate to ±2 μm and, in skilled hands, can reliably reveal differences of 1 μm. That is one millionth of a metre or one thousandth of a millimetre. That’s not far.
This potent tool is going to tell me a lot about the world, starting with the bicycle. Stay tuned.
Continental’s tan-wall Grand Prix 5000
Jobst Brandt preferred pale-coloured sidewalls because they made it easier to spot tyre damage. He was always checking for tyre damage, that one. Goes with the mountain territory in which he rode.
Brandt took a dim view of Continental tyres, but maybe that was because he worked for a competitor (Avocet). Or maybe it was because Continental bicycle tyres were pretty terrible before the original Grand Prix 4000 came along. They had extraordinarily high rolling resistance and the sidewalls were prone to blowing out (Continental didn’t use a chafer, so the rim edge often cut through the sidewall).
A couple of questions come to mind:
should carbon road bikes have anachronistic tan-wall tyres?
should vulcanised clinchers have light-coloured sidewalls?
I say yes and no respectively.
Yes, because deep-section carbon rims are nicely set off by tan sidewalls. It’s all about the C of CRAP design principles.
(Likewise, I prefer black tyres on silver metal rims. I know that’s not what classic road bikes had in the age of tubulars. I guess some things have improved after all.)
What’s anachronistic about a colour anyway?
But should vulcanised clinchers mimic open tubulars? I demur. Mimicry is pastiche and even fraudulent if the tyre doesn’t have a construction method that causes the appearance: that is, a cotton casing treated with a fine layer of naturally coloured latex rubber to protect the ply threads upon which is glued a tread with ample carbon black.
I’ll take my vulcanised clinchers black and my open tubulars tan, please. With black treads.
Ask Cecil A Throckmorton
Dear Cecil: I have lost skin on both thumbs and the second tyre bead is still laughing at me. What should I try next?—Tobias
Dear Tobias: Your question contains a clue. Have you ever wondered why the second bead is harder to fit than the first?
It cannot be that the first bead is always luckily longer than the second.
Nor is it likely that the first rim wall is always lower than the second one.
In fact, of course, the two beads are the same length and the two rim walls are the same height.
The key to fitting difficult tyres is to get the bead into the deepest part of the rim well at the opposite side of the wheel. This generates the slack that allows the last section of bead to slip over the rim wall.
Even fractions of a millimetre of available bead circumference make a difference. So tiny differences of technique matter.
The first bead naturally seeks the deepest part of the well, like a ball rolling into a valley, as you tug the tyre at the opposite side of the wheel. But when you fit the second bead, the first bead is already occupying that prime spot. Therefore you need to push the first bead off-centre and give the second bead a little help to get it into the deepest part of the well.
Help may consist of manipulation by hand, string, zip-ties, or straps around the minor circumference of the tyre and rim, or my preferred method of forcing some objects into the gap between the rim wall and second tyre bead to hold the bead in the centre of the rim well. Suitable household objects include packing peanuts and clothes-pegs. Sticks found by the roadside work but run the risk of leaving debris in the tyre. A helper’s hands, to make four, can work too.
Perfect technique will make fitting the second bead as easy as the first. That’s how you know you’ve done it right.
∞
Do you need advice, technical or existential, about a cycling matter?
Send your question to bicyclingage@gmail.com with Dear Cecil in the subject line.
Bon week-end, as they spell it here.
Ride bike!
Samuel